Supported Terminals
Tap currently supports the following payment terminals. More terminals will be added in due time.
- Payter Apollo
Payter sells the Apollo with or without SIM. Make sure you order the right one for you. If you have inherited a terminal and need a SIM card for it, Tap can provide that for you - reach out to sales@tapelectric.app.
Contactless payments with Payter Apollo terminals
Tap will onboard the terminal for you to to MyPayter.
Please send us your terminal serial number to sales@tapelectric.app at least 3 business days before the planned installation date.
When you purchase a license for a terminal in Tap, you are purchasing it for the account where you have added the terminal.
If you are an installer, and setting up the terminal for your customer: make sure the location has already been linked to your customer's connected account before onboarding the payment terminal.
If you make a mistake, you can always delete the terminal and start over after the location has been linked to the Connected Account in Tap.
Connecting the terminal to the internet
There are several options to connect the terminal to the internet.
- LAN cable. Simply plug the terminal into your wired internet connection.
- Payter SIM. If you purchased the terminal with a SIM from Payter, it should come preconfigured and directly connect to the internet.
- Tap Electric SIM. You can use a SIM from Tap -- in this case, you will need to configure the terminal with the SIM's settings, see below for further info. If you need a SIM, please reach out to sales@tapelectric.app.
- Your own SIM. You can use your own SIM -- in this case, you will need to configure the terminal with the SIM's settings, see below for further info.
- Wifi. You can connect the terminal to wifi -- in this case, you will need to configure the terminal with the wifi settings, see below for further info.
Configuring SIM settings in the terminal (Tap SIM or your own non-Payter SIM)
You will need to modify the APN settings in the terminal so that your SIM can connect to the internet. To do this, you need to access the terminal service menu. This has a 2-factor authentication that works with the MyPayter portal. After you onboarded the terminal in Tap, you should have received an email from MyPayter to login to your new MyPayter account that Tap created for you automatically.
- Insert your SIM card into the terminal's modem.
- Power on the terminal.
-
On the terminal screen, tap the upper left corner 5 times to bring up the (hidden) settings menu. See video below for clarity. On some units if upper left corner is not working, try upper middle.
-
Press the Settings button (gear in the bottom right).
-
Click the icon next to "Challenge" - this will generate a code. Copy that down, you will enter this code into MyPayter.
-
Login to the MyPayter portal on your laptop browser.
-
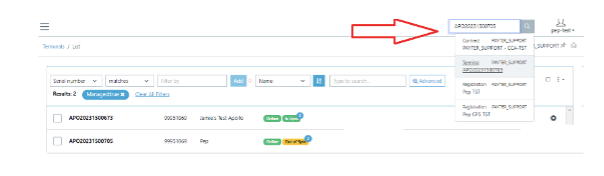
In MyPayter, look up the terminal serial number via the search bar.
-
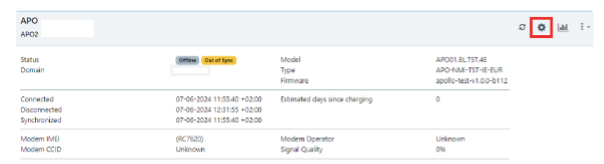
Click the gear icon.
-
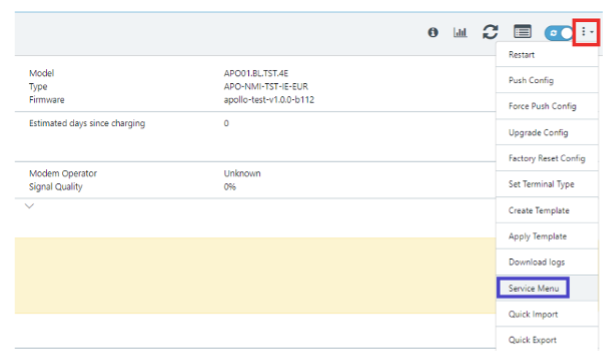
Click the 3 dots on the right hand side of the screen and choose for the option service menu.
-
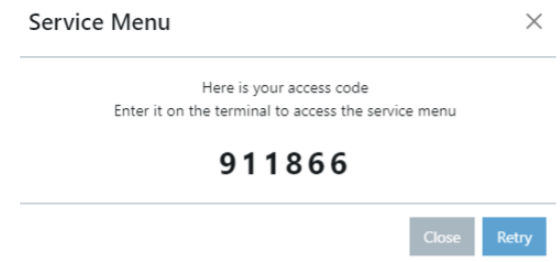
Enter the code you copied from the terminal.
-
MyPayter will return another code that you need to enter into the terminal.
-
Enter the MyPayter code into the terminal. You will now be in the terminal's service menu.
-
Scroll down the page and click Modem Settings.
-
Enter your SIM's settings.
-
Press Save.
Using a Tap SIM? Enter these details:
Pin code SIM: 0000
APN name: Tapelectric
Username: user
Password: pass
You should now see the terminal connect to the internet in MyPayter.
The terminal is now ready to use - make sure to double check your tariff at the location, and test the terminal with a real session before opening up to the public.
Configuring Wifi (WLAN) settings in the terminal
You will need to enter your wifi settings in the terminal so that the terminal can connect to the internet. To do this, you need to access the terminal service menu. This has a 2-factor authentication that works with the MyPayter portal. After you onboarded the terminal in Tap, you should have received an email from MyPayter to login to your new MyPayter account that Tap created for you automatically.
- Follow the procedure from the previous section to enter the terminal's service menu.
- Once you have entered the service menu, scroll down the page and click WLAN Settings.
- Enter your wifi network name and password.
- Press Save.
You should now see the terminal connect to the internet in MyPayter.
The terminal is now ready to use - make sure to double check your tariff at the location, and test the terminal with a real session before opening up to the public.
Onboarding your terminal in Tap
-
Make sure you have sent your terminal serial number to sales@tapelectric.app at least business days before your planned installation date.
-
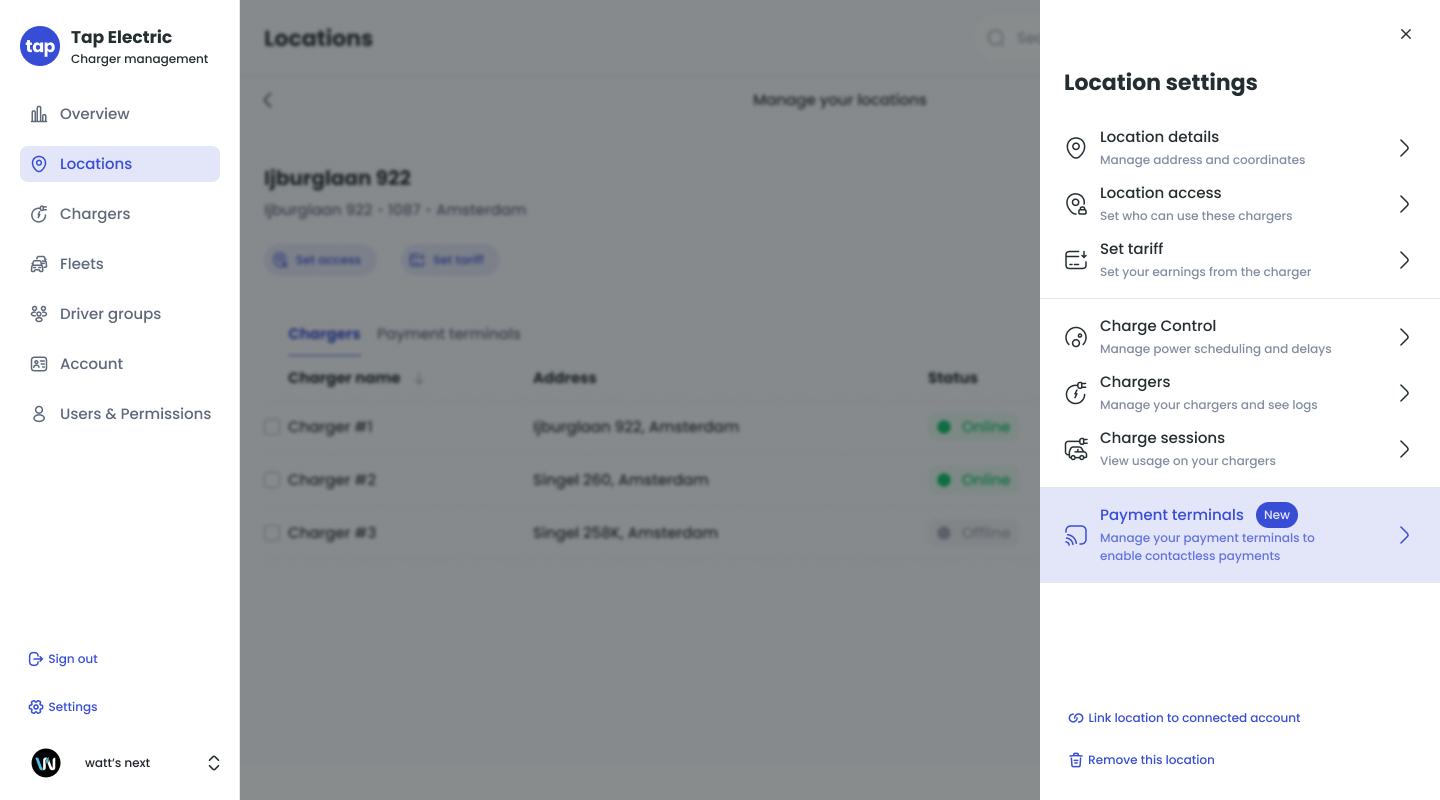
Navigate to Location > Location settings > Payment terminals
-
Click Connect new terminal (if you are adding your very first terminal, you will not see this button, but instead immediately jump to the next step).
-
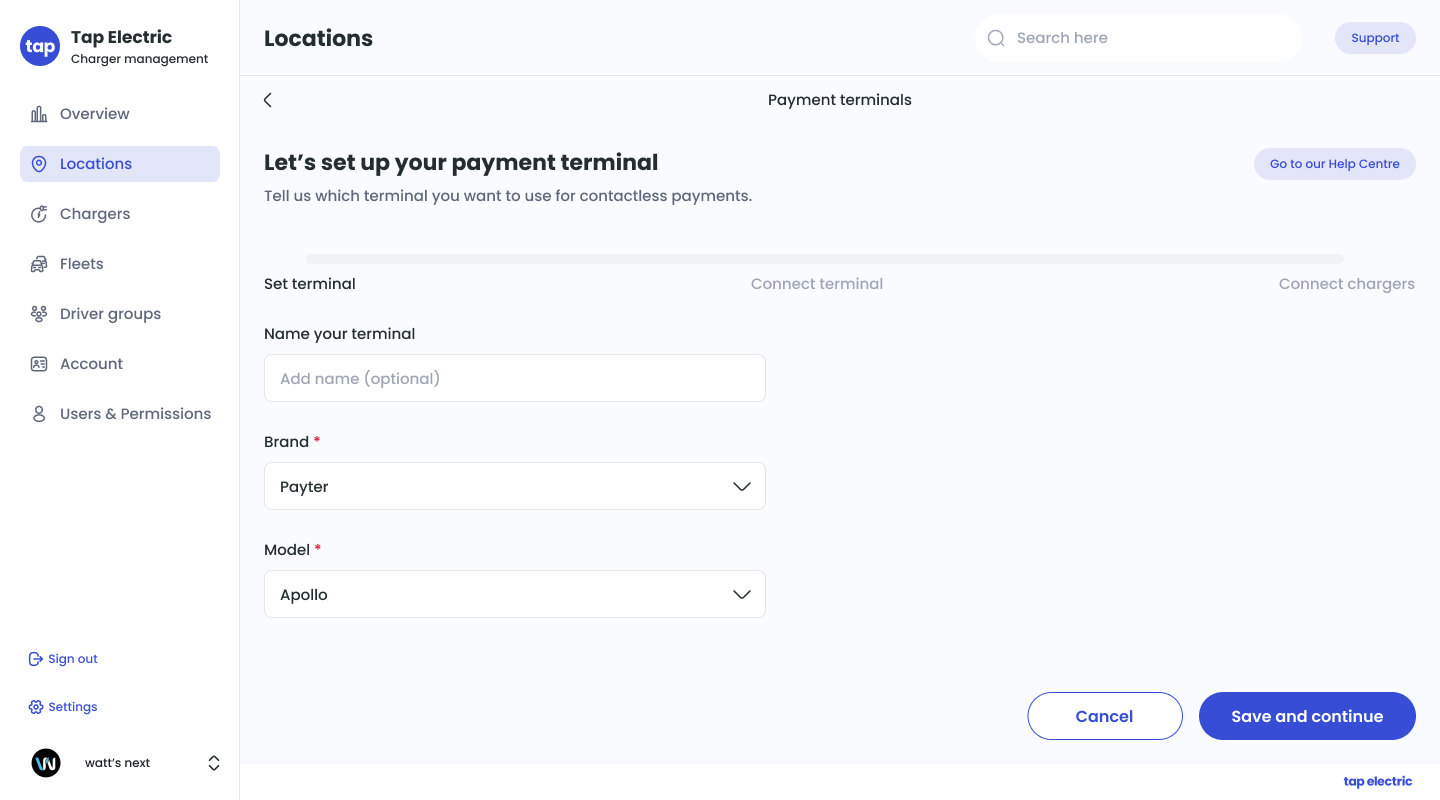
Optionally set a name for your terminal. This is to help you distinguish between terminals if you have more than one at a location.
-
Choose your terminal brand and model from the drop downs. Click Save and continue.
-
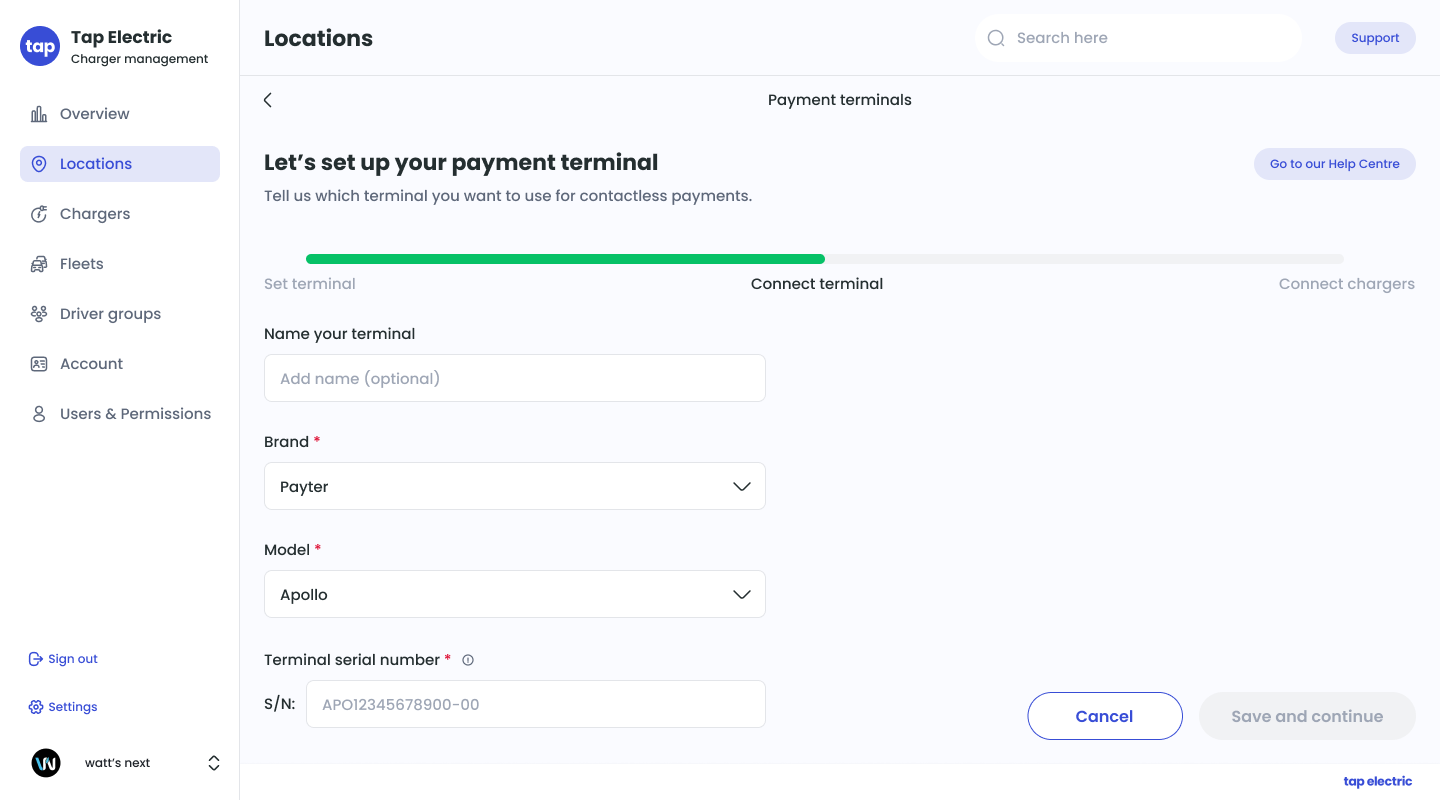
Add your terminal serial number. Click Save and continue.
-
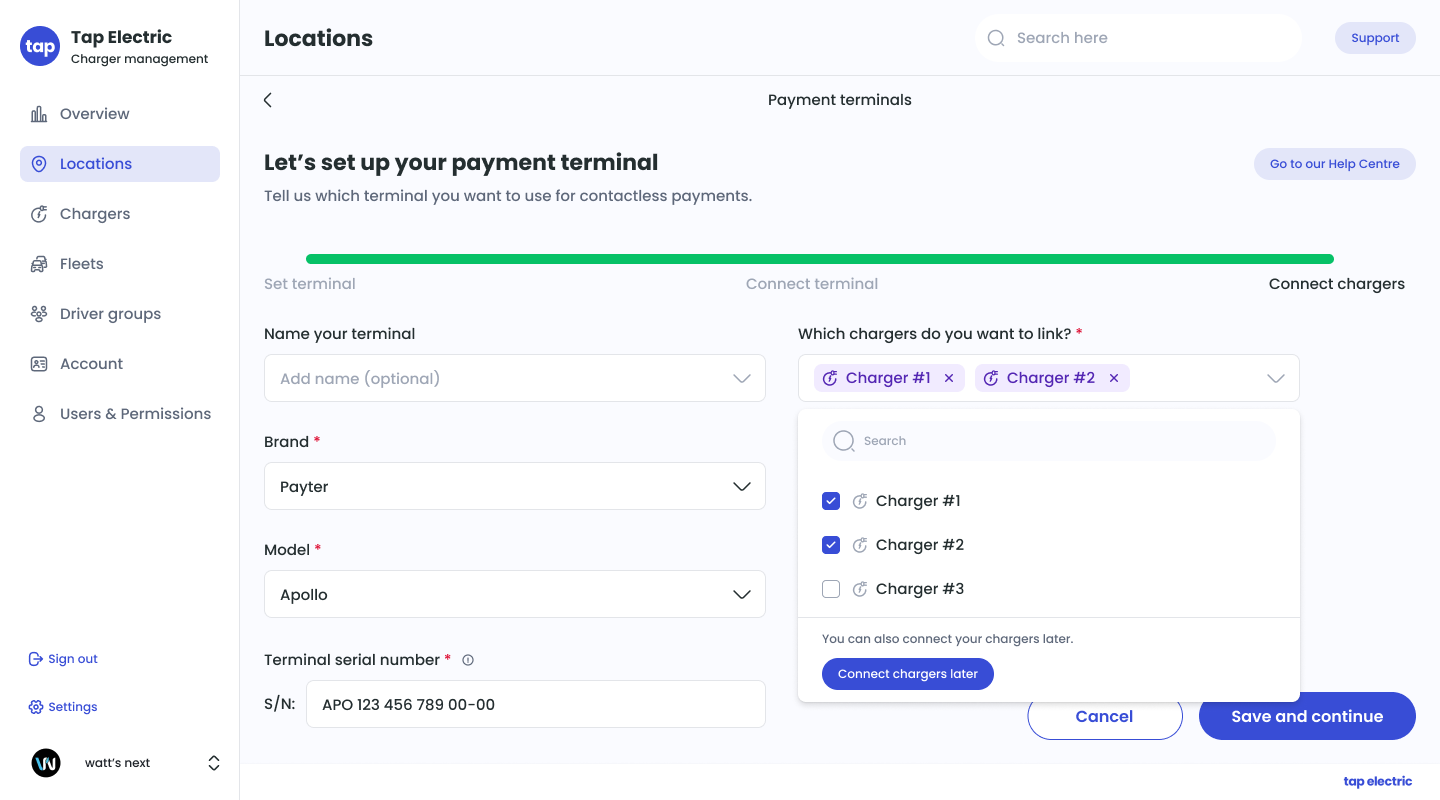
Select which chargers you want to link to the terminal. These are the IDs that will appear on the terminal touchscreen for drivers to choose from. Click Save. The terminal is now onboarded in Tap and ready to be connected to the internet.
Editing your terminal
You may want to edit your terminal to add new chargers or remove old ones. Note you cannot edit serial number; if you need to change the serial number, you need to delete the terminal.
- Navigate to Location > Location settings > Payment terminals
- Click on the "..." icon next to the terminal you wish to edit, and click Edit
- Once you are done editing, click Save.
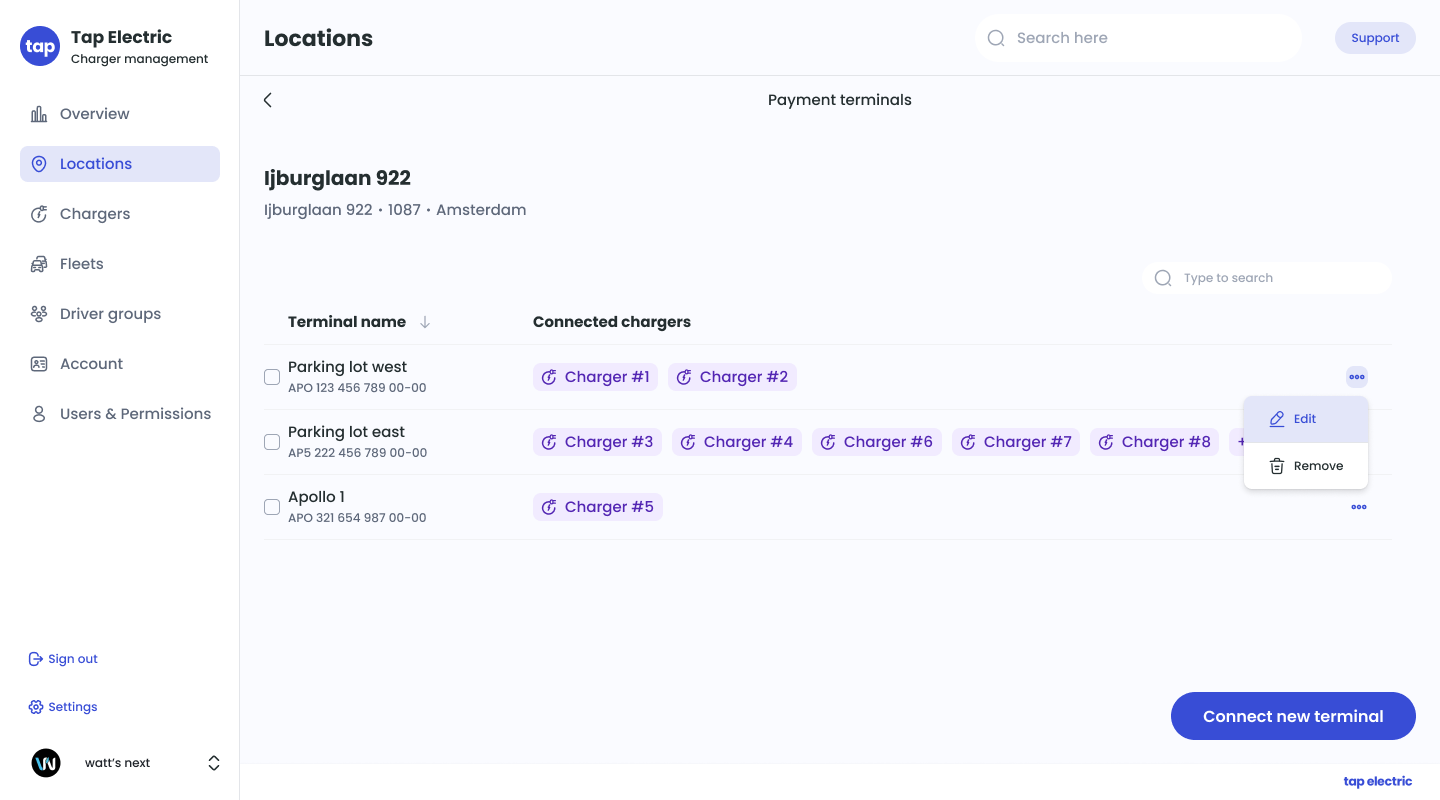
Removing your terminal
If you are replacing or retiring a terminal, you should remove it.
- Navigate to Location > Location settings > Payment terminals
- Click on the "..." icon next to the terminal you wish to edit, and click Remove
- Double check the name or serial number of the terminal you are removing, and click Confirm.
Tariffs for contactless payments
Contactless payments use the same default reimbursement tariff that you configure for all sessions on your locatio. You do not need to configure a special tariff. Tap adds a transaction fee towards the driver, as we would with a guest user from the Tap app.
Payouts for contactless payments
Tap does monthly automated payouts for all sessions on your chargers. This includes sessions from contactless payments, as well as the Tap app and Tapkeys, and 3rd party roaming apps.
You do not need to do anything to enable these payouts once you have added your terminal. You can find more info about setting up your payout settings here.