This document assumes that you already have a Tap Electric account. If you don't, please see our Quick Start Guide to get your account setup and locations onboarded.
The Fleet Management module is currently activated by request. If you wish to turn on this module, please reach out to sales@tapelectric.app. You can also request Tapkeys for your fleet drivers.
Creating a fleet
Fleet management is currently only available in the Tap Webportal, not in the Tap app.
-
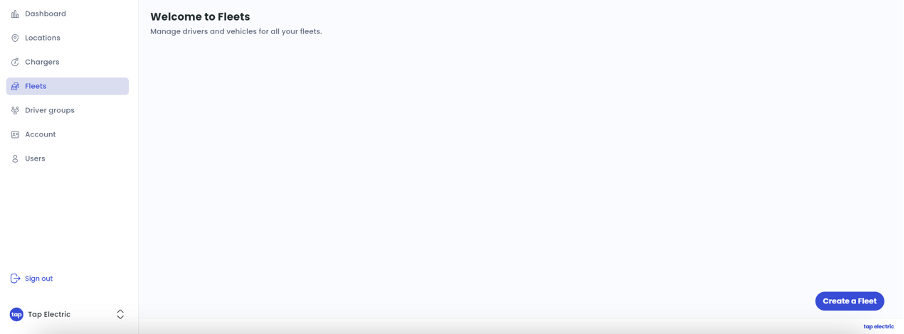
In the Tap Webportal, navigate to Fleets in the sidebar.
-
Click Create a Fleet.
-
Name your fleet. Click Next.
-
You can either add drivers or vehicles to your fleet. This determines where the charge card is assigned to - is it assigned to a specific driver, or does the card live in a shared pool vehicle?
Adding a driver
If you want the driver to have home reimbursement, aka split billing, make sure to add the location first. See the Quick Start Guide for help with that.
-
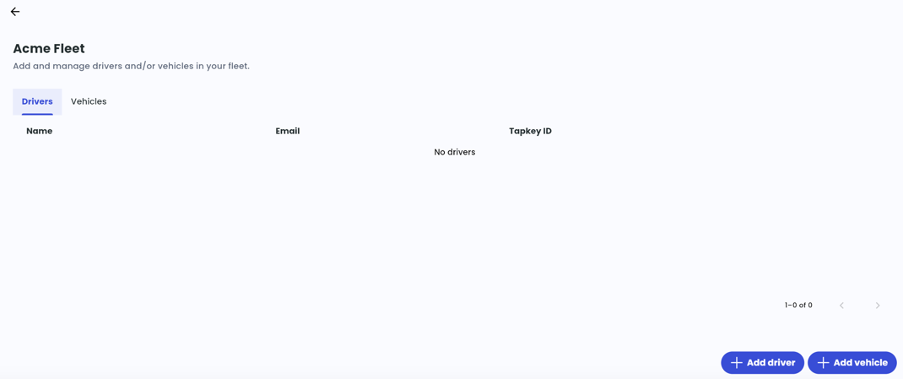
Click Add driver.
-
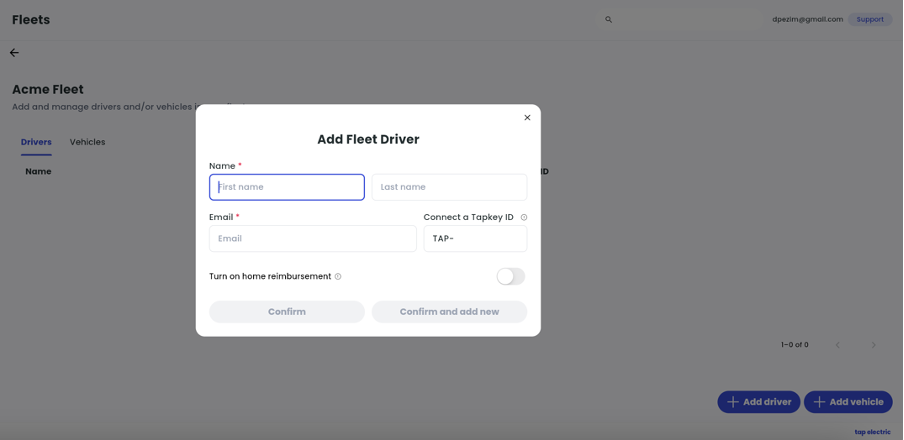
Enter the driver's name and email.
-
You can now link a Tapkey ID to the driver. As a fleet manager, you can order Tapkeys for your drivers. Reach out to sales@tapelectric.app if you need these.
-
If you do not need home reimbursement for this driver, click Confirm. If you do need home reimbursement, see the next section.
Adding home reimbursement for a fleet driver
-
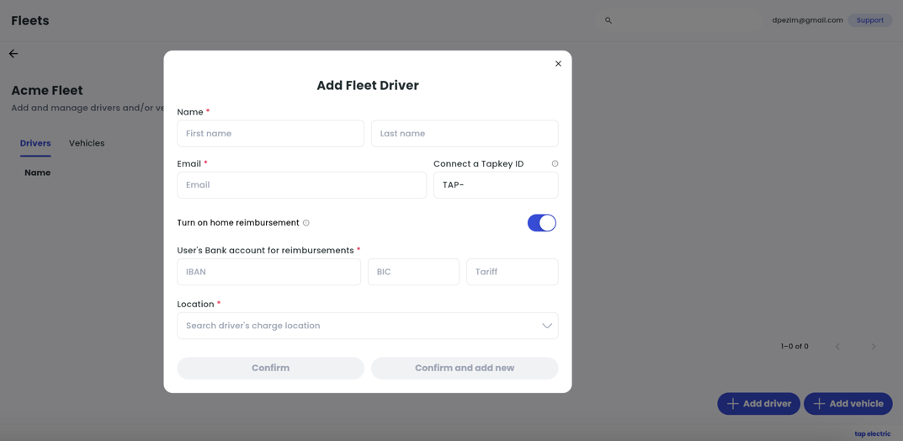
Once you have entered all of your driver details in the Add Driver form, turn on the home reimbursment switch.
-
Enter the driver's bank details.
-
Enter the desired tariff.
Note that home reimbursement is treated as an expense payment, not as the sale of electricity, so there is no VAT applied. See our Terms and Conditions for more details.
- Select the driver's home location from the dropdown.
- Click Confirm. Or, if you are adding more drivers, click Confirm and Add New.
Questions on home reimbursement? Check the FAQ.
Adding a vehicle
-
After completing the 4 steps to Create a Fleet above, click Add vehicle.
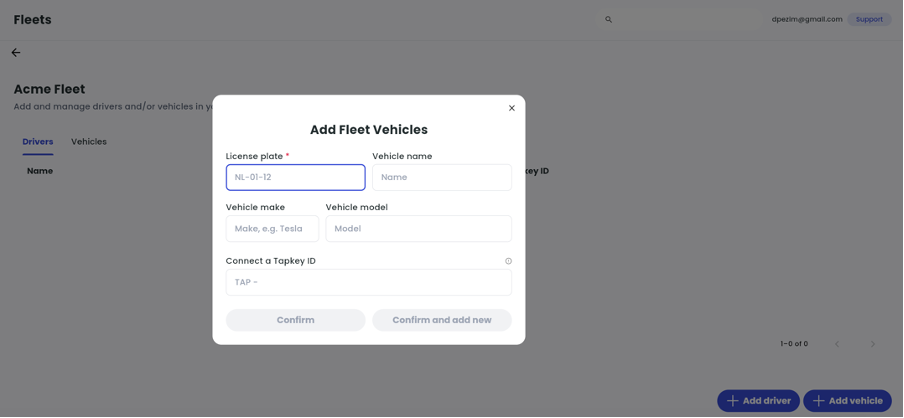
-
Enter the license plate number - this is the main ID for the vehicle.
-
Optionally enter the rest of the vehicle details.
-
You can now link a Tapkey ID to the vehicle. As a fleet manager, you can order Tapkeys for your drivers. Reach out to sales@tapelectric.app if you need these.
Editing fleets
Deleting a fleet
- In the Tap webportal, navigate to Fleets in the sidebar.
- Click the "..." next to the fleet you wish to delete.
- Click Delete, and confirm.

Editing a fleet driver & their reimbursement tariff
You can edit several properties of a fleet driver:
- Name
- Tapkey ID
- Home reimbursement (aka split billing) details
- Bank account details
- Reimbursement tariff
- In the Tap webportal, navigate to Fleets in the sidebar.
- Click on the fleet you wish to edit drivers in.
- Click the "..." next to the driver you wish to edit, and click Edit.
- Edit the desired properties.
- Click confirm.
Editing a vehicle
You can edit several properties of a fleet vehicle:
- License plate
- Vehicle name
- Vehicle make and model
- Tapkey ID
- In the Tap webportal, navigate to Fleets in the sidebar.
- Click on the fleet you wish to edit vehicles in.
- Click the "..." next to the vehicle you wish to edit, and click Edit.
- Edit the desired properties.
- Click confirm.