ICS Onboarding Guide
- 29 Sep 2023
- 1 Minute to read
- Contributors

- DarkLight
- PDF
ICS Onboarding Guide
- Updated on 29 Sep 2023
- 1 Minute to read
- Contributors
- DarkLight
- PDF
Article summary
Did you find this summary helpful?
Thank you for your feedback!
This guide describes how to onboard ICS chargers with Tap.
Onboarding in this context means getting the charger communicating with Tap. If you are looking for a complete guide for setting up an account and configuring your locations, see our Quick Start Guide.
To connect ICS chargers, first ensure you have updated to the latest firmware for the charger. You will need to be located with a laptop or phone nearby the charger for the onboarding.
In the Tap app: Locations > connect new charger
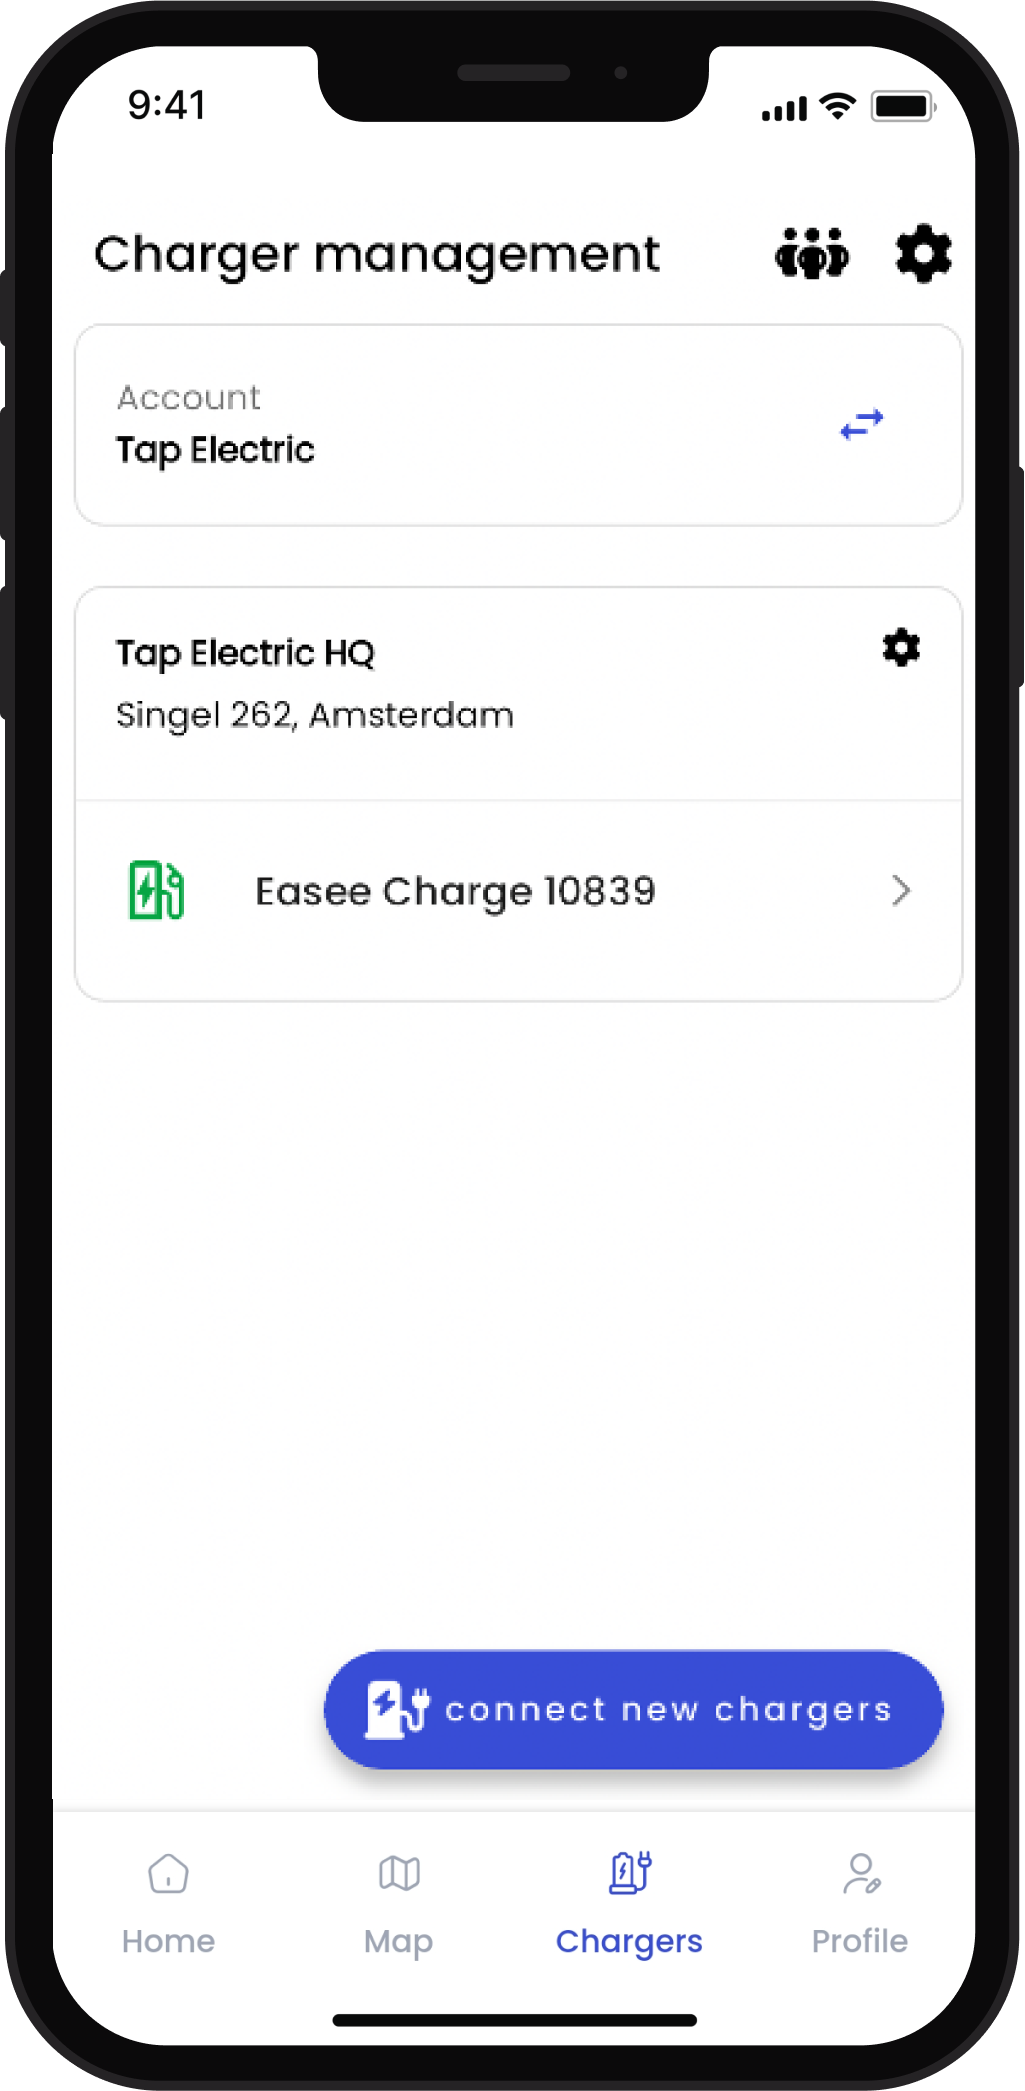
Select ICS.
Copy the URL provided. Note that the manufacturer splits this URL in their app, so you can also copy the URL in separate parts in Tap.
Search Wi-Fi via your phone, laptop or tablet and select the Wi-Fi SSID listed on the label on the charger.
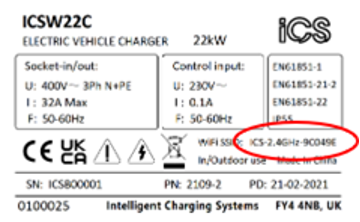
Enter the default Wi-Fi password ‘ics654321’
Open a web browser on your device. In the address bar, enter '192.168.10'. This will open the ICS portal.
Enter Username 'install', Password 'icspass21'.
Navigate to Basic > Server
In Endpoint, select 'User Defined'.
Enter the other fields as copied from the Tap app: Domain, Port and Path.
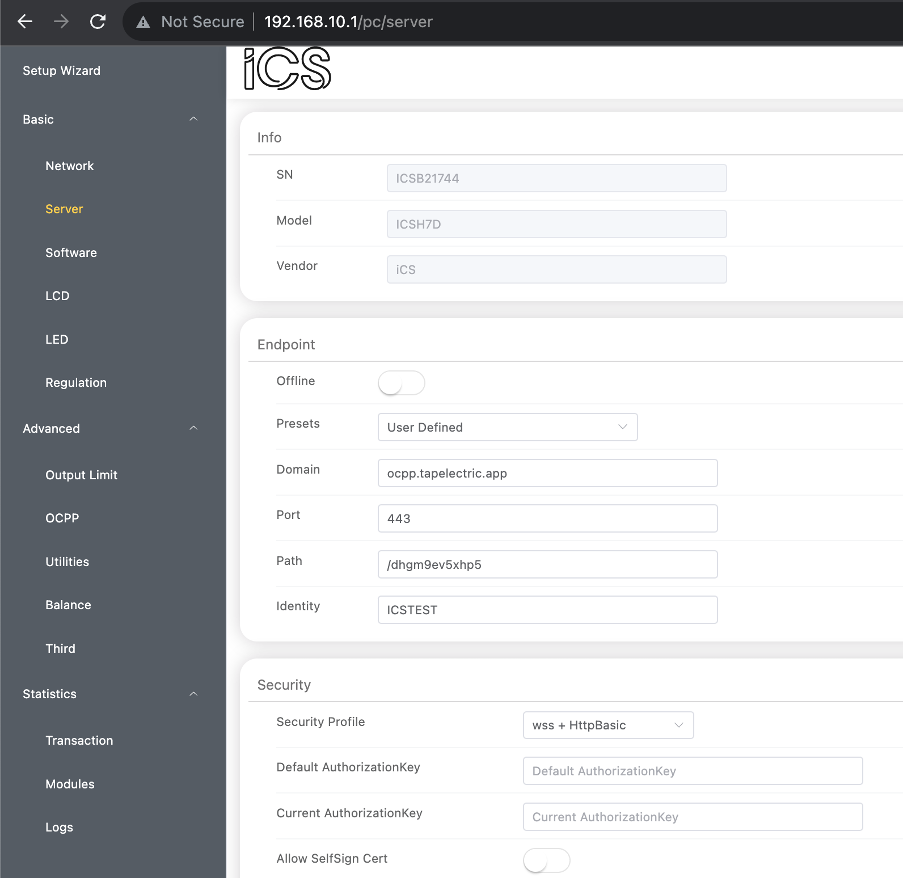
In Security Profile, select 'wss + HttpBasic'.
Identity should be the charger ID.
Click Submit.
Reboot the charger.
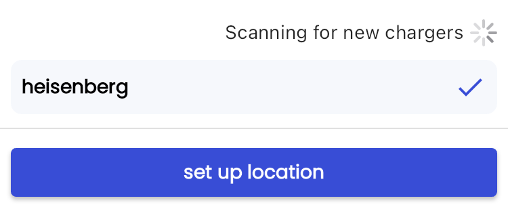
In the Tap app, after a minute the charger should appear and you can proceed with onboarding.