This guide describes how to onboard Garo LS4/GTB chargers with Tap.
Onboarding in this context means getting the charger communicating with Tap. If you are looking for a complete guide for setting up an account and configuring your locations, see our Quick Start Guide.
To connect Garo LS4/GTB chargers, you will need to be physically located at the charger with a laptop and a micro USB cable.
-
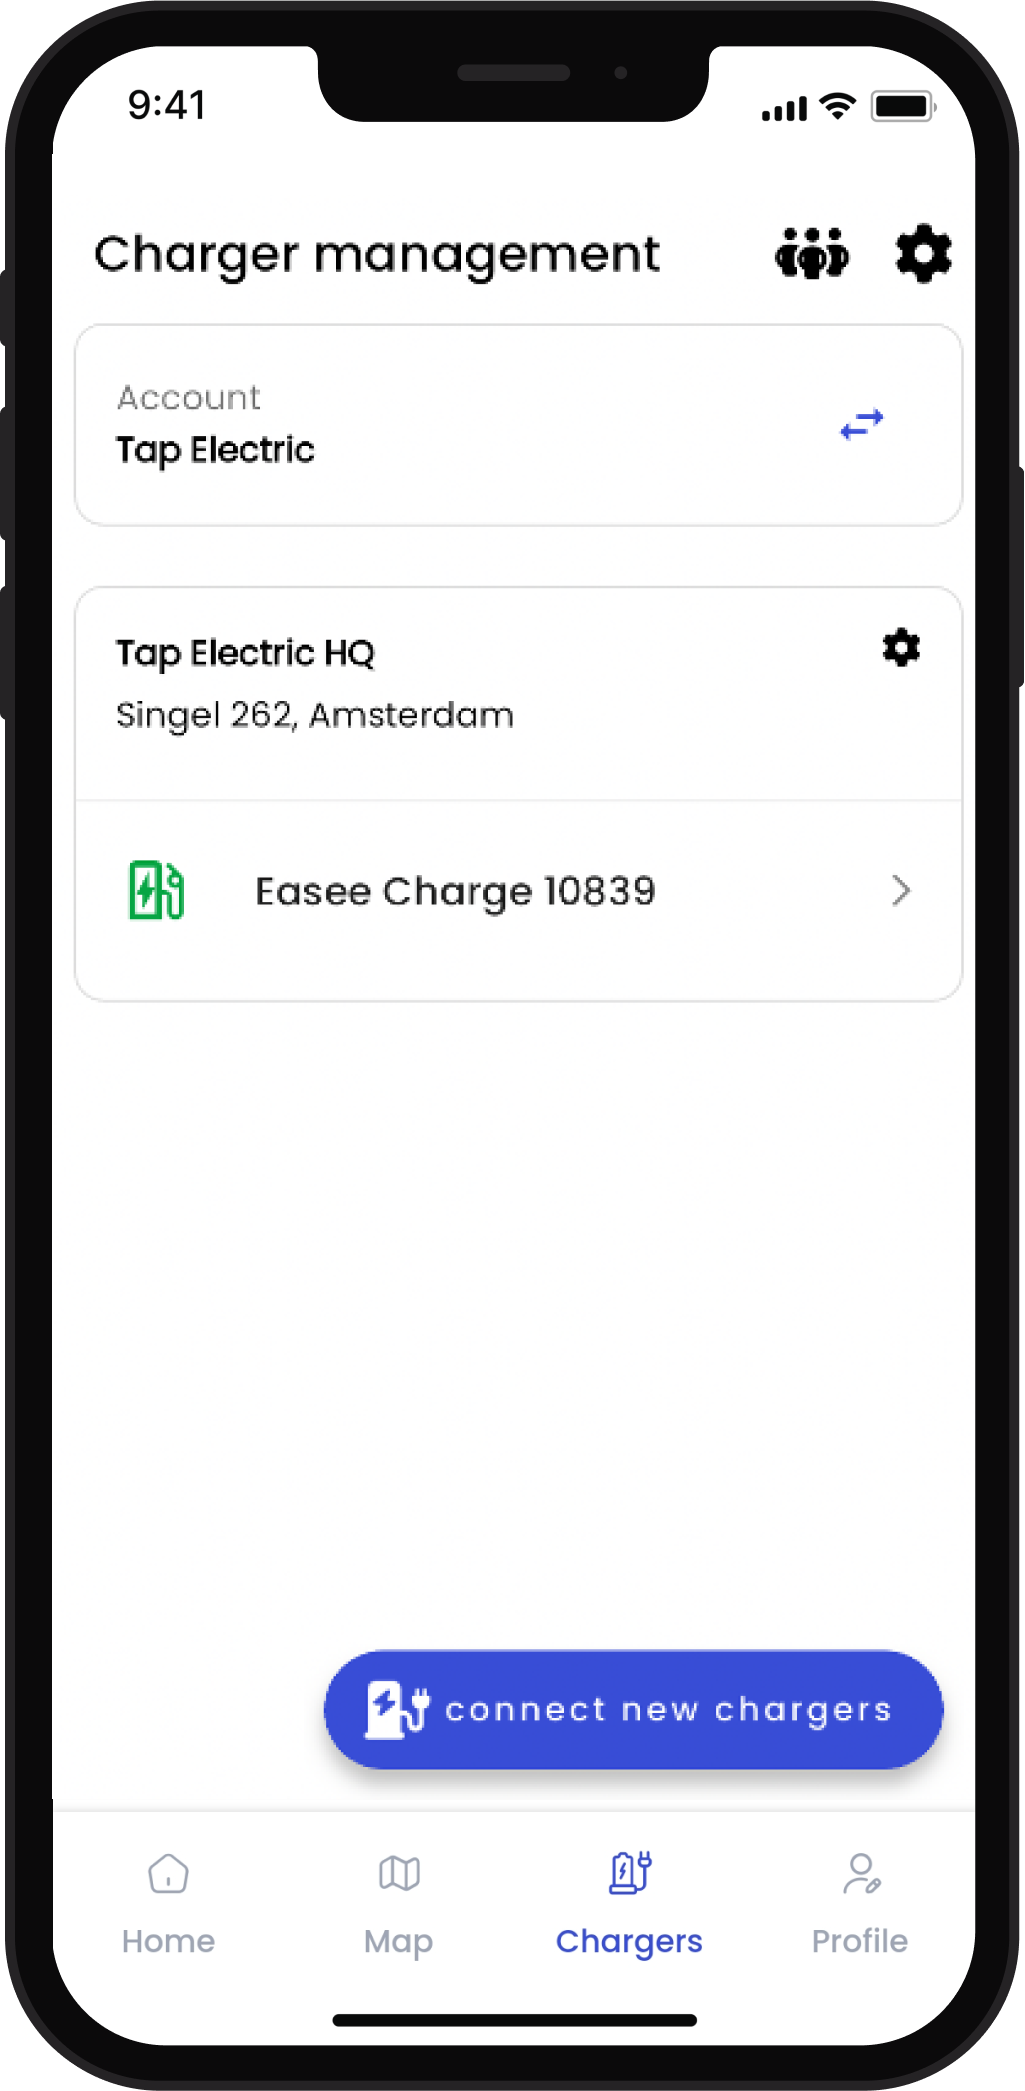
In the Tap app: Locations > connect new charger
-
Select Garo LS4/GTB.
-
Copy the URL provided.
-
Plug your laptop into Garo controller using a micro USB cable. If the charger has two charge controllers make sure you plug into the charge controller on the right-hand side and DO NOT remove any cables or links between the charge controllers.
-
Open a web browser and type in your IP address (192.168.123.123/operator) to access the charge controller.
-
Click on ''Master'', which is the left-hand side charge controller. Then on ''Operator''. It will ask for username and password:
Username: operator
Password: cherry_zone OR yellow_zone
The next steps will depend on which login screen you see:
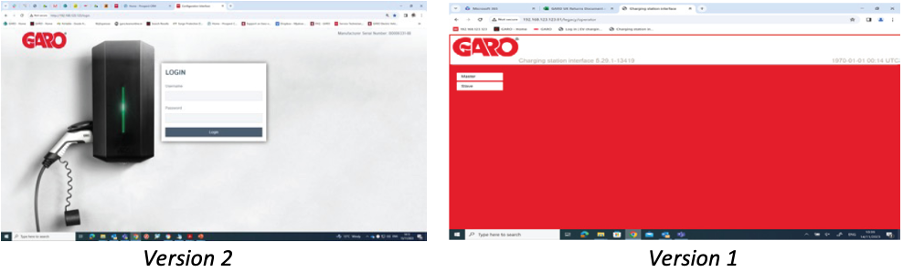
Login Version 1
- Open another tab in your browser.
- Click on ''Slave'', which is the right-hand side charge controller. Then on ''Operator''. It will ask for username and password:
Username: operator
Password: cherry_zone OR yellow_zone
-
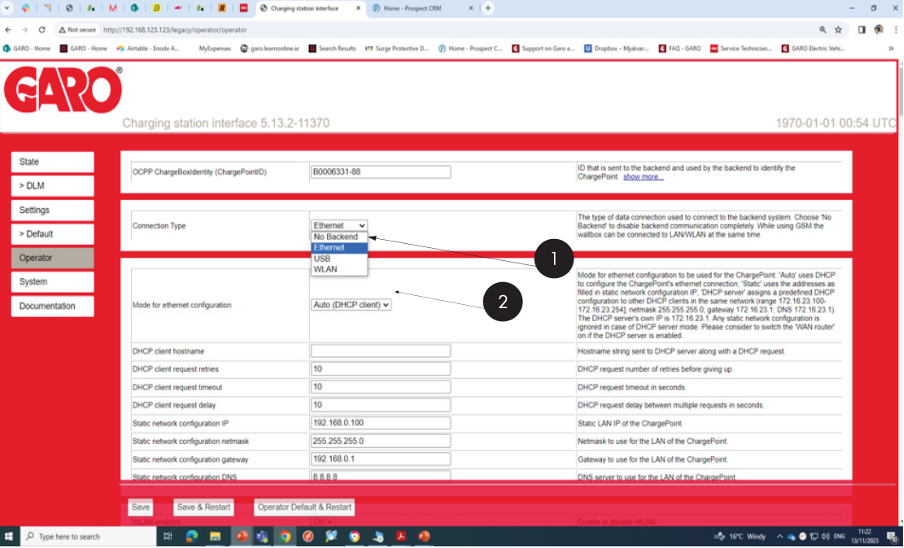
After logging into the controller, navigate to "Operator" in the lefthand menu.
-
Set the Connection type according to the type of internet used.
-
Select the appropriate mode for the connection type.
-
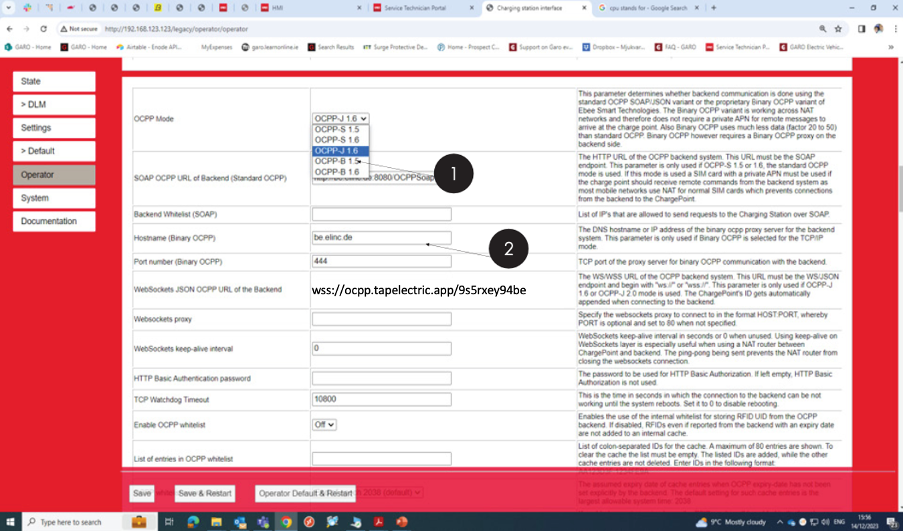
Set OCPP mode to OCPP-J 1.6.
-
In "Websockets JSON OCPP URL", past the URL you copied in Tap.
-
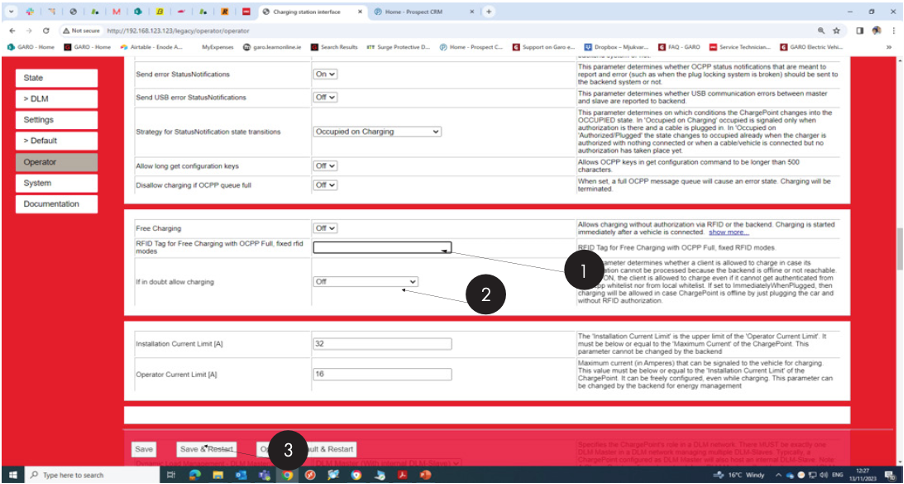
Set "RFID tag for free charging" to Off.
-
Set "If in doubt allow charging" to Off.
-
Click Save & Restart.
-
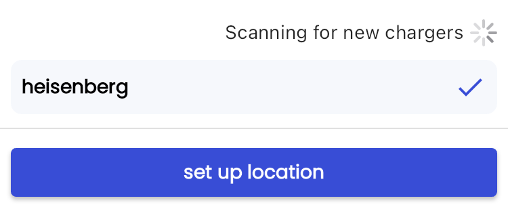
Return to the Tap app. After a minute the charger should appear and you can proceed with onboarding.
Login Version 2
-
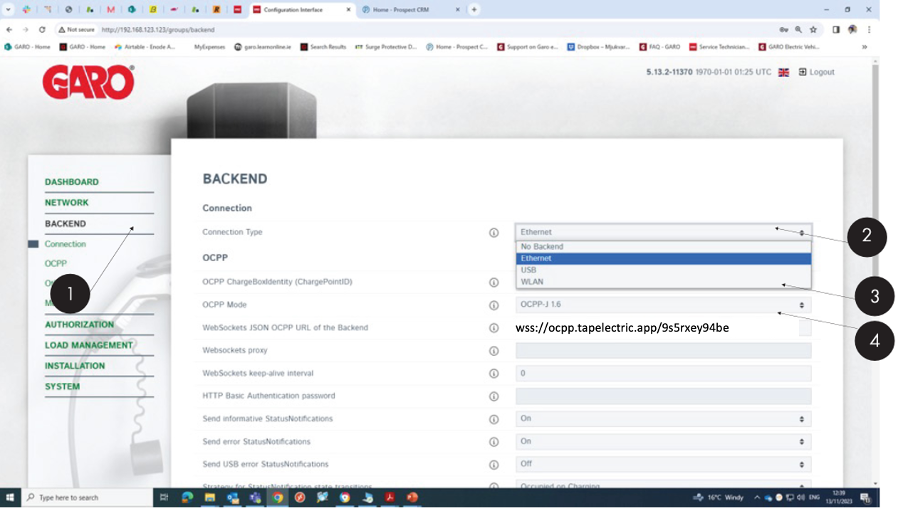
Navigate to "Backend" in the lefthand menu.
-
Set the Connection type according to the type of internet used.
-
Set OCPP mode to OCPP-J 1.6.
-
In "Websockets JSON OCPP URL", past the URL you copied in Tap.
-
Click Save.
-
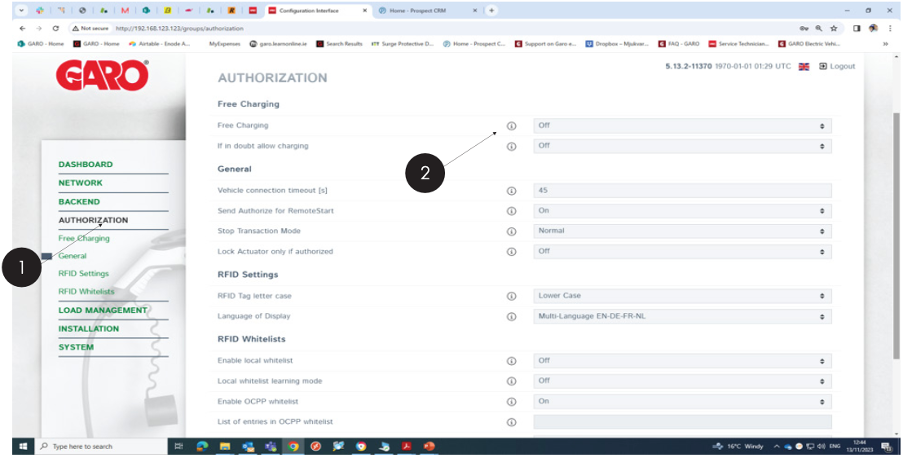
Navigate to "Authorization" in the lefthand menu.
-
Set "Free charging" to Off.
-
Set "If in doubt allow charging" to Off.
-
Return to the Tap app. After a minute the charger should appear and you can proceed with onboarding.