
How do I add a new location?
Last updated:
Only available on Tap Web
Add the location first and connect chargers to it later, or connect a charger and add its location as you go.
Start adding a location
Section titled “Start adding a location”- Locations > Connect new chargers
- Choose Create an empty location. To connect a charger at the same time, choose its brand instead and follow the steps; you reach the same location form at Set location.
Installers: add the location from your customer list with Add charger, so it’s created in your customer’s account. See Set up an Installer Account.
Enter the address
Section titled “Enter the address”- Enter a Location name (optional; drivers see it in the app), then the Address, City, Postcode and Country.
- If the address doesn’t match what we find, a Did you mean suggestion appears. Select it, or correct the fields. You can’t save until the address matches.
- Check the map pin. Drag it to where the charger actually is, ideally within 50 m of the address. The Coordinates update as you move it.
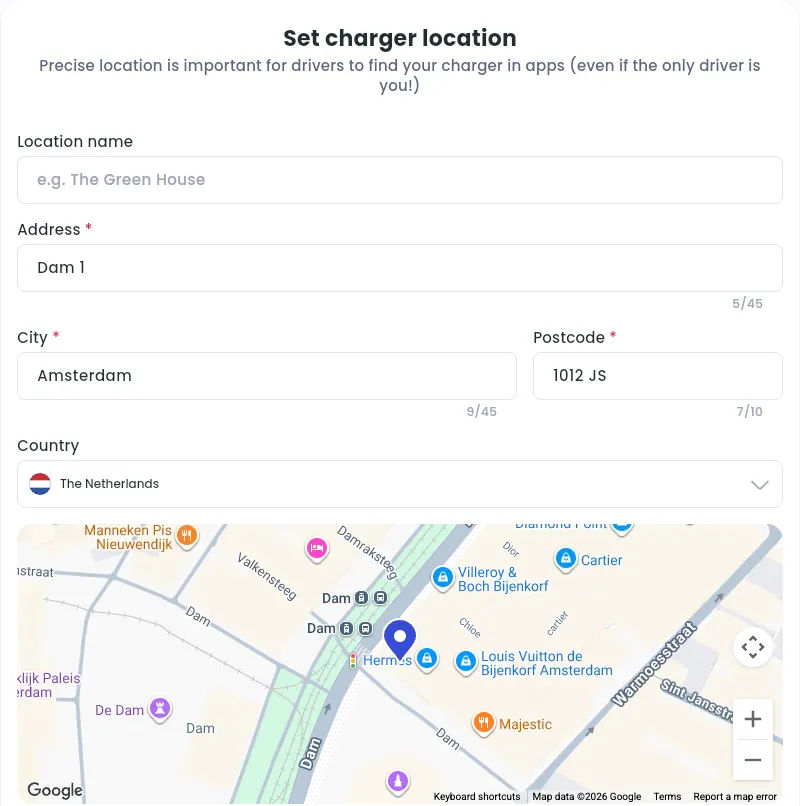
Choose what kind of site it is
Section titled “Choose what kind of site it is”Under What kind of site is this?, choose:
- Public: open to everyone, such as visitors, customers or anyone passing by.
- Private: for you, your residents, your staff or your fleet.
Then choose the Type of site. It’s required.
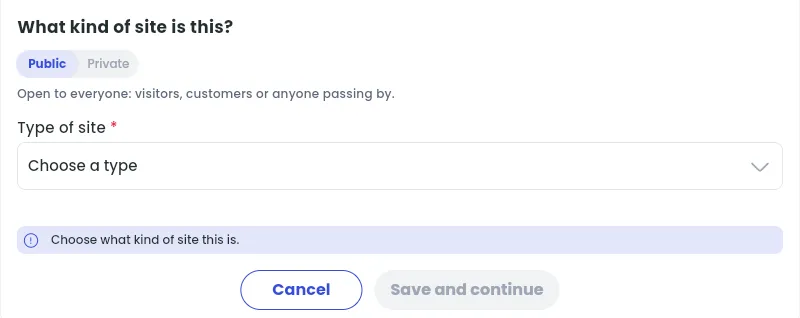
- Public: On the street, Public car park, Supermarket, Shopping centre, Hotel, Restaurant or café, School or education, Sports or leisure, Healthcare, Fuel station or motorway, Station, airport or P+R, Other public site
- Private: Workplace or office, Fleet depot, Apartment building, Home, Other private site
Select Save and continue. The location is created.
Finish setting up the location
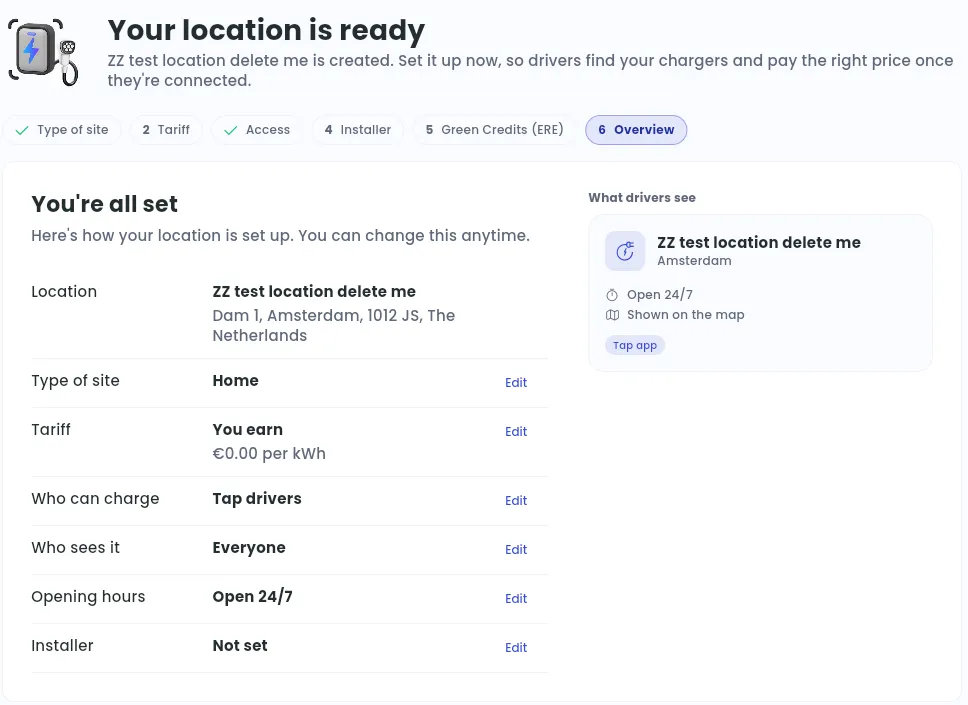
Section titled “Finish setting up the location”On Your location is ready, work through the steps. You can skip any step with Skip for now and change everything later in the location’s settings.
-
Tariff: what you earn per kWh, plus an optional start or idle fee. Until you set one, you earn nothing from charging here. See How do I set tariffs for my charger location or individual chargers?.
-
Access: who can charge, and who sees the location on the map. See below.
-
Installer: optional. Tell us who installed your chargers.
-
Green Credits (ERE): Netherlands only. Claim ERE credits for the renewable energy your chargers deliver.
-
Overview: check the summary, select Edit next to anything you want to change, then select Complete. The location page opens, where you can connect chargers with Connect new chargers.
Organisation Accounts also see Connected account and Reimbursement steps, after Access:
- Connected account: is the charger at an employee’s home? Choose At an employee’s home and pick the employee’s Connected Account, or select Create a connected account. Otherwise keep At our company. See What is a connected account and when do I need one?.
- Reimbursement: reimburse an employee for every kWh charged at this home charger, paid out through Tap with your fleet. See FAQ - Home reimbursement (Split Billing).
Access and visibility during setup
Section titled “Access and visibility during setup”The setup uses different names for the same options you find later under the location’s access settings:
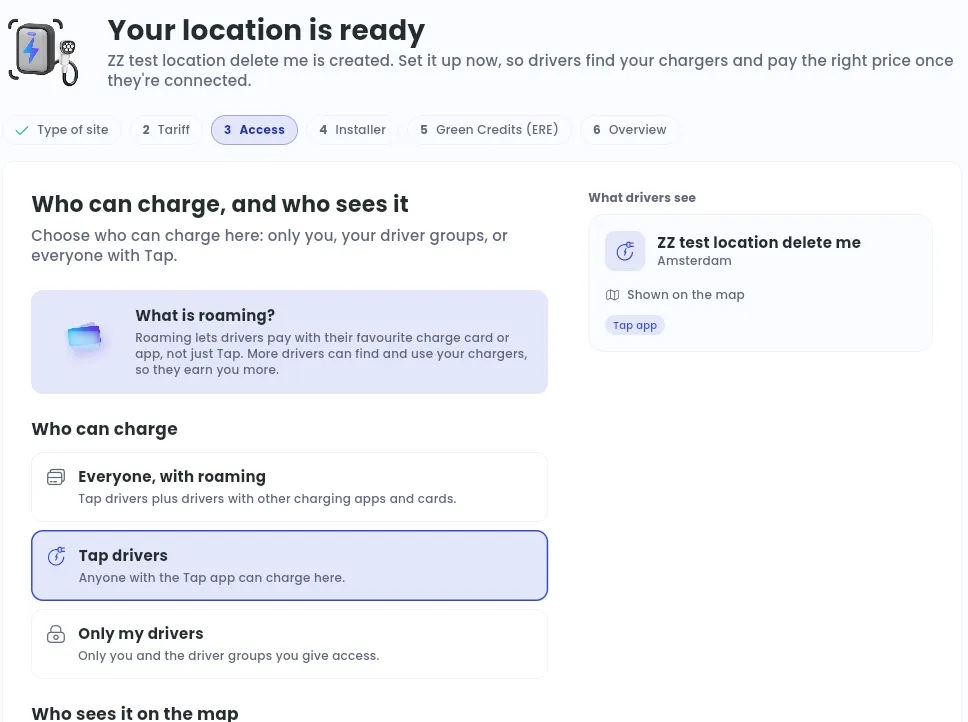
Who can charge
- Only my drivers (in settings: Closed): only you and the driver groups you give access.
- Tap drivers (in settings: Tap users): anyone with the Tap app.
- Everyone, with roaming (in settings: Roaming): Tap drivers, plus drivers with other charging apps and cards.
Who sees it on the map
- Only drivers with access (in settings: Driver Groups only)
- Driver groups and nearby drivers (in settings: Driver Groups and nearby)
- Everyone (in settings: Everyone)
See How do I set up my location access and visibility? for opening hours, free usage keys and the other access settings.