
Sungrow onboarding guide
Last updated:
These steps are for the Sungrow IDC30E DC charger and use the charger’s screen. You need the maintenance password from Sungrow’s Quick Installation Guide. Add the charger to your own Individual or Organisation Account. Installers: switch into your customer’s account first.
Copy your Tap URL
Section titled “Copy your Tap URL”-
With Manage selected at the top, open your location on the Home tab, tap Chargers, then Connect new chargers. For a new location, tap + below your locations on the Home tab.
-
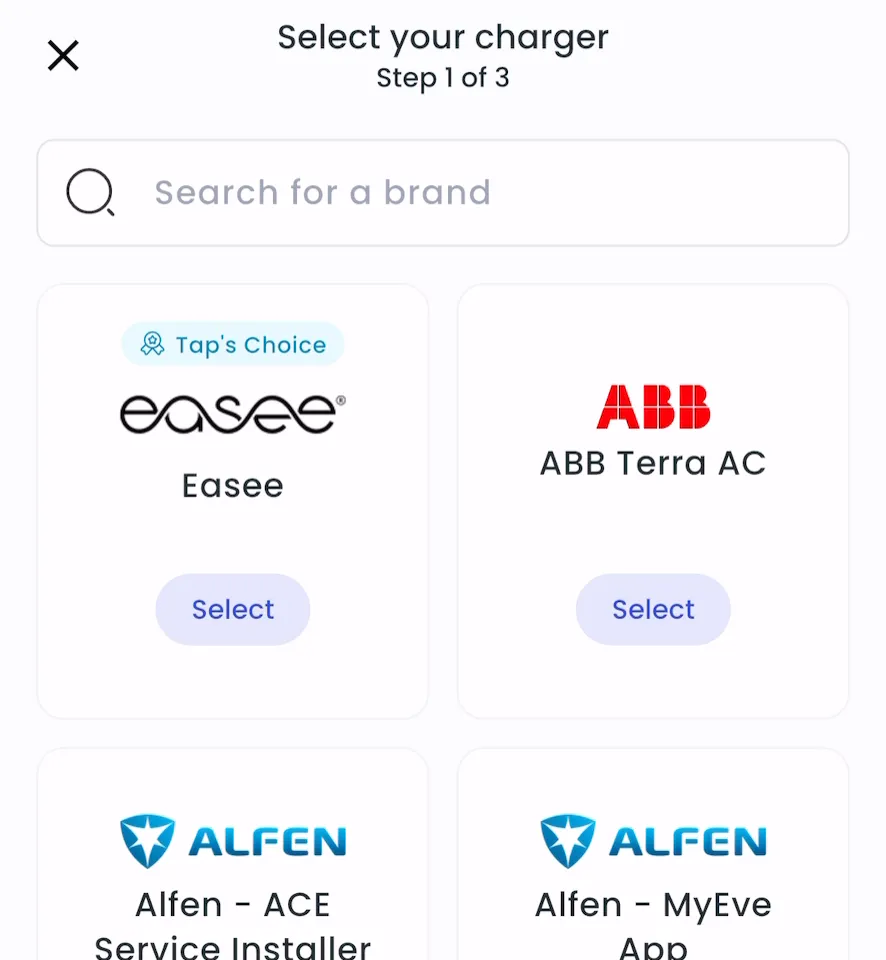
Search for Sungrow and tap Select.
-
Copy the URL.
-
Locations > Connect new chargers, or click Connect new chargers on a location page.
-
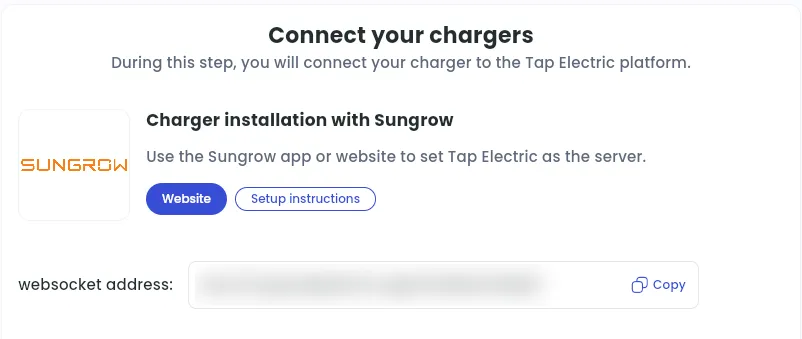
Under Choose your charger brand, search for Sungrow and click it.
-
Copy the websocket address.
Connect the charger to the internet
Section titled “Connect the charger to the internet”- On the charger’s screen, press and hold the time in the top-left corner for 4 seconds. Enter the maintenance password to open operation and maintenance mode. See the Sungrow user manual for details.
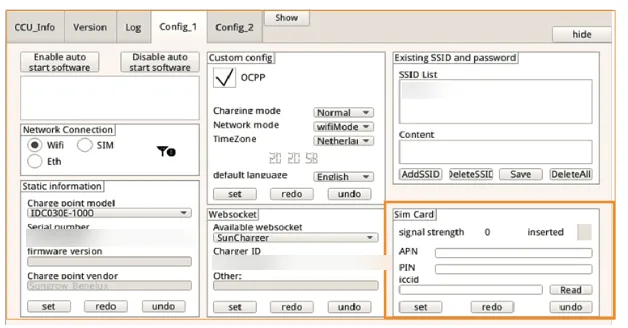
- Open the config_1 tab and choose the connection under Network Connection:
-
Wi-Fi: select Wifi. Under Existing SSID and password, tap AddSSID, enter your network name and password, and tap ok.
-
Tap SIM card: with the charger off, insert the SIM card, then power the charger on. Select SIM. In the SIM Card section, tap Read, set APN to Tapelectric and tap set.
-
Ethernet: select Eth.
-
Set Tap as the backend
Section titled “Set Tap as the backend”-
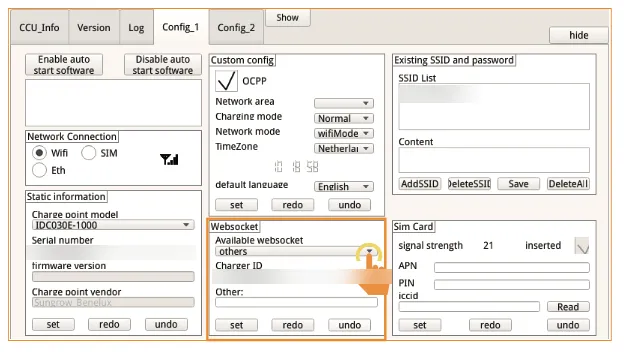
Under Websocket, set Available websocket to Others.
-
In the pop-up, paste the URL you copied from Tap. Keep the charger ID as the unit’s serial number.
-
Tap set.
-
Restart the charger.
After a minute, the charger appears in Tap.
Set the location
Section titled “Set the location”- Under Where is the charger?, choose New location and enter the address, or pick an Existing location.
- On You’re all set, choose what to do next, or tap Go to my location.
- Under Your chargers, check that the charger is listed, then click Continue.
- Complete the Set location and Location settings steps.