
How can I configure my charger settings?
Last updated:
Rename a charger, edit its electrical details, run remote commands and check how it’s connecting.
Open the charger: with Manage selected at the top, go to Home > [your location] > Chargers > [your charger]. At a location with one charger, the location’s and the charger’s settings are on one page.
If your account has only one charger, for example a home charger, the Home tab shows that charger straight away: Unlock and Start buttons, its Charging setup and its Recent sessions. Tap All charger settings for everything else, or Connect another charger at the bottom to add one.
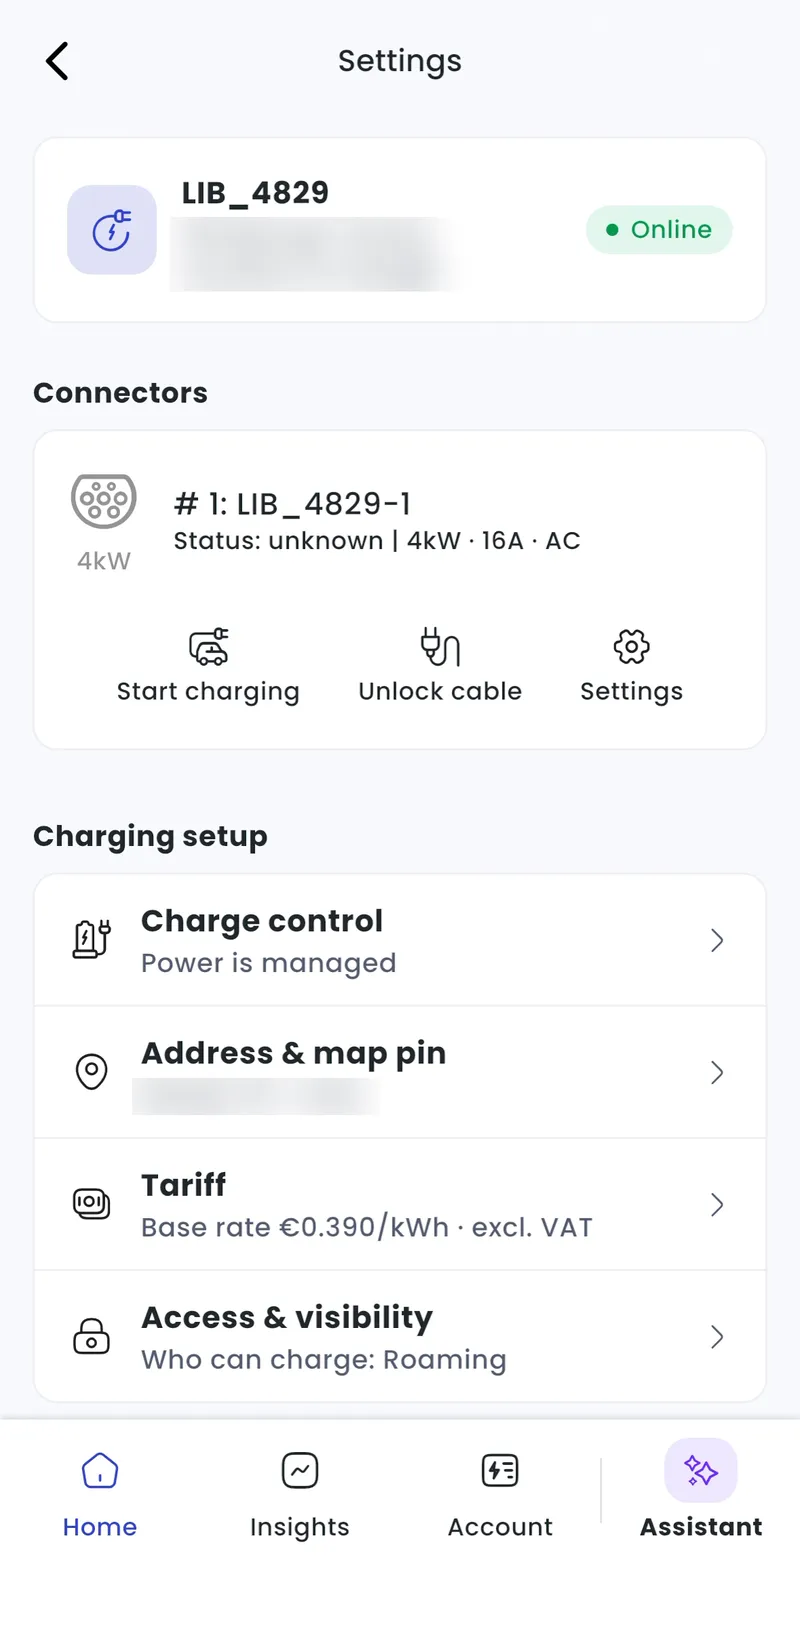
Open the charger: Chargers > [your charger]. Most settings are under More actions.
Rename a charger
Section titled “Rename a charger”-
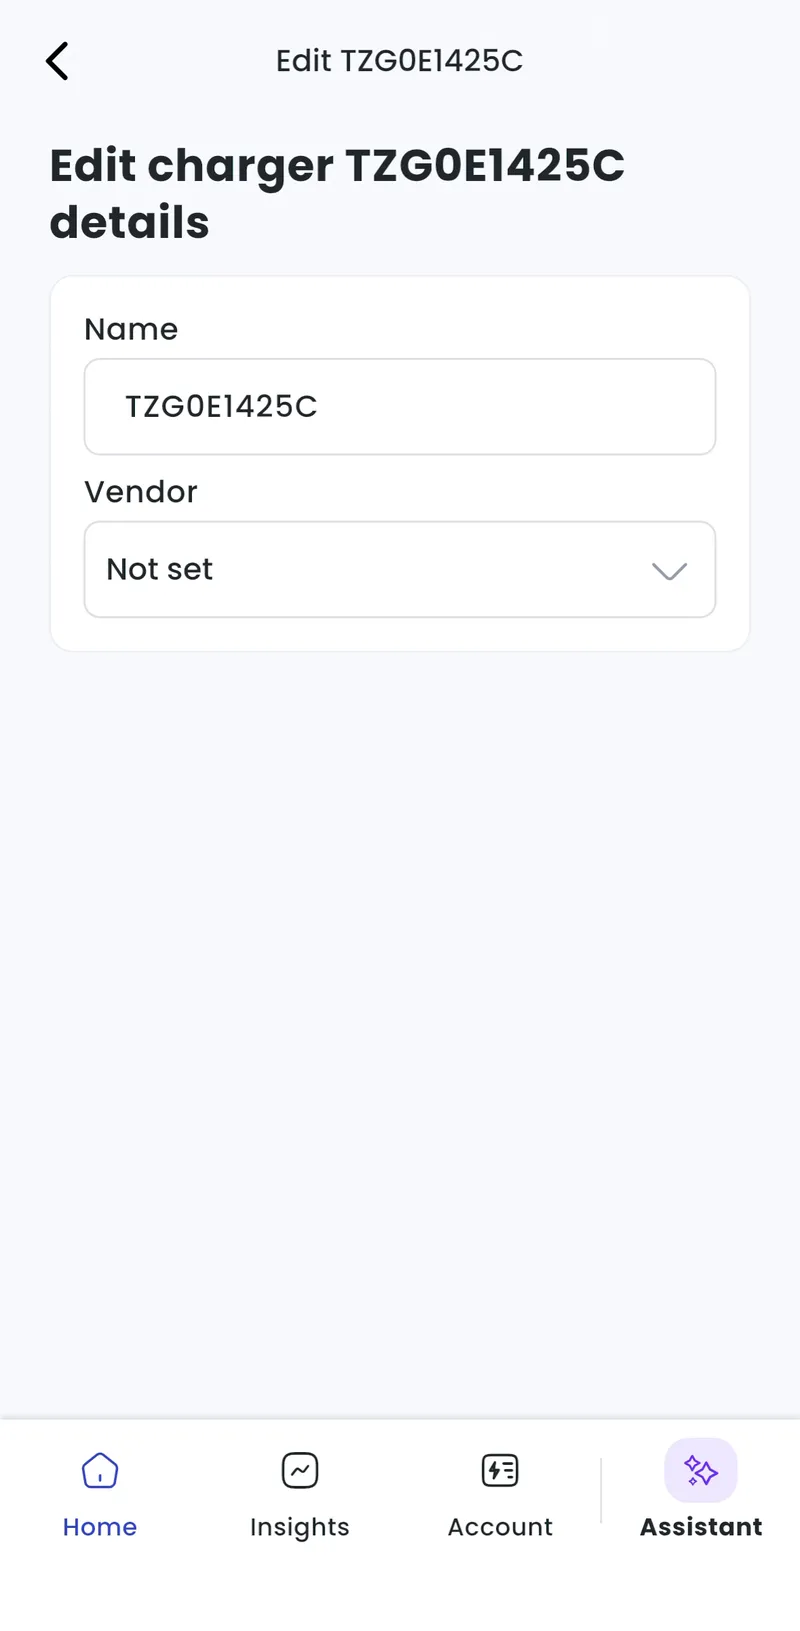
Under More, tap Charger details.
-
Change the Name. You can also set the Vendor.
-
Save your changes.
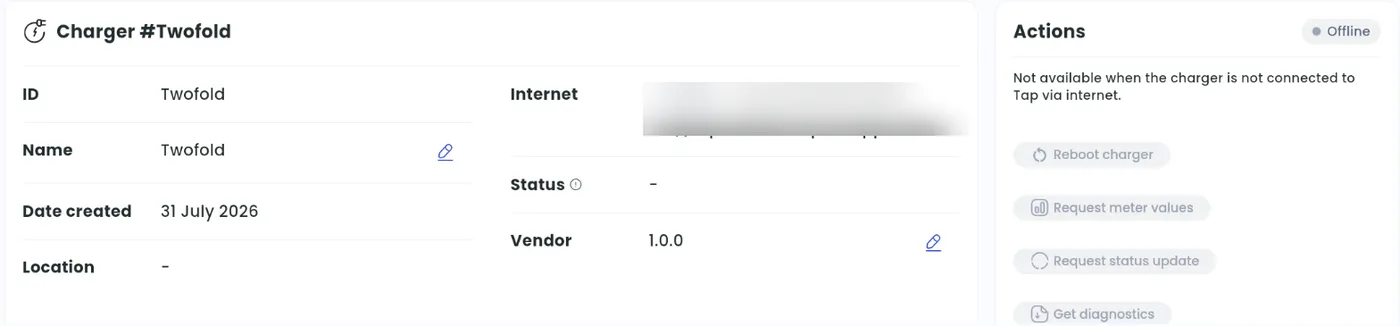
- Click the pencil icon next to Name.
- Change the name and confirm.
Edit the electrical details
Section titled “Edit the electrical details”-
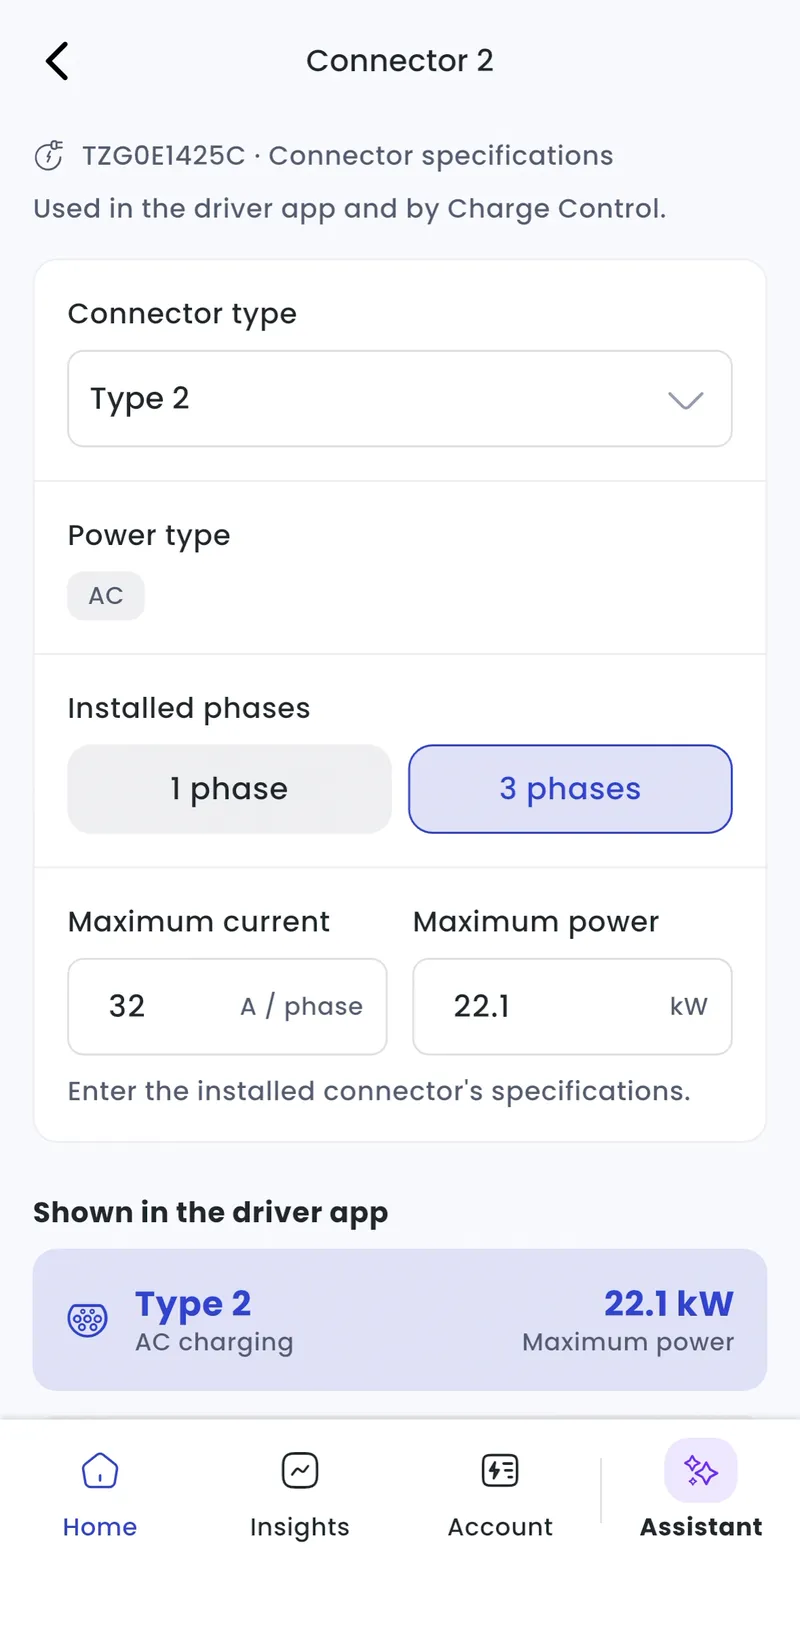
Under the connector, tap Settings. You can also open the connector under Connector specifications.
-
Edit the Connector type, Installed phases, Maximum current and Maximum power. Shown in the driver app previews what drivers see.
-
Tap Save specifications. This updates the details in Tap only: the charger’s own configuration is managed separately.
- Open the connector’s settings on the charger page.
- Edit the connector type, amperage, phases and power, then confirm.
Reboot, unlock or start a session remotely
Section titled “Reboot, unlock or start a session remotely”- Rebooting fixes many common charger problems, so it’s a good first thing to try.
- If a cable is stuck, try Unlock cable before rebooting. It’s often faster.
- Under the connector: Start charging and Unlock cable. If your account has one charger, Start and Unlock are also right on the Home tab.
- Start charging asks how the session should start. Whoever the tag belongs to pays for the session, unless it charges for free:
- Charge as yourself: opens the charger the way any driver sees it. Tap Charge here to start a regular session, paid the way you set up in the app.
- Last used on this charger: starts the session straight away with the tag that was used here last. Its owner pays.
- Charge for free: adds a free usage key to the charger and starts the session straight away with it. Pick it again next time.
- Another tag: type the ID of a charging card or tag, and the session starts straight away on that tag.
- Use Last used on this charger or Another tag to check that the charger starts charging (a charger problem rather than a card or app problem), or to start a session for a driver whose card isn’t being read. To charge your own car, use Charge as yourself, or Charge here on the charger as a driver.
- Unlock asks you to confirm first. Any active session on that connector is stopped.
- Under Help & maintenance > Troubleshooting: Reboot charger, Request status update, Request meter values, Clear charging profiles, Get diagnostics and Update charger firmware.
- Update charger firmware: choose Upload file to upload the firmware file from your phone, or URL to enter a link the charger can download it from.
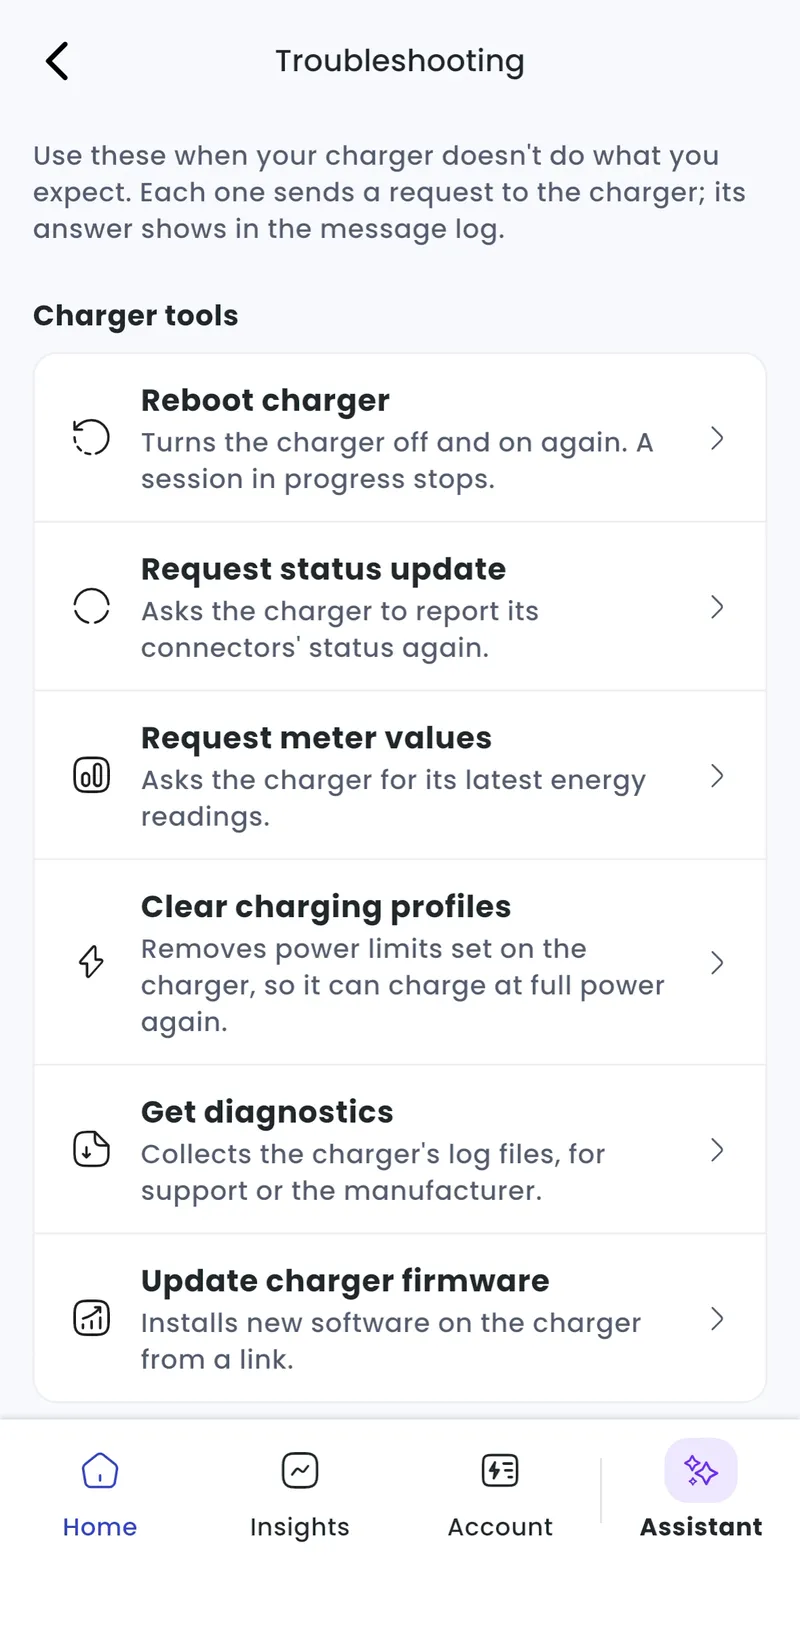
- In the Actions panel: Reboot charger, Request meter values, Request status update, Get diagnostics and Update charger firmware.
- Update charger firmware: upload the firmware file from your computer, or enter a URL the charger can download it from. You don’t need your own file server.
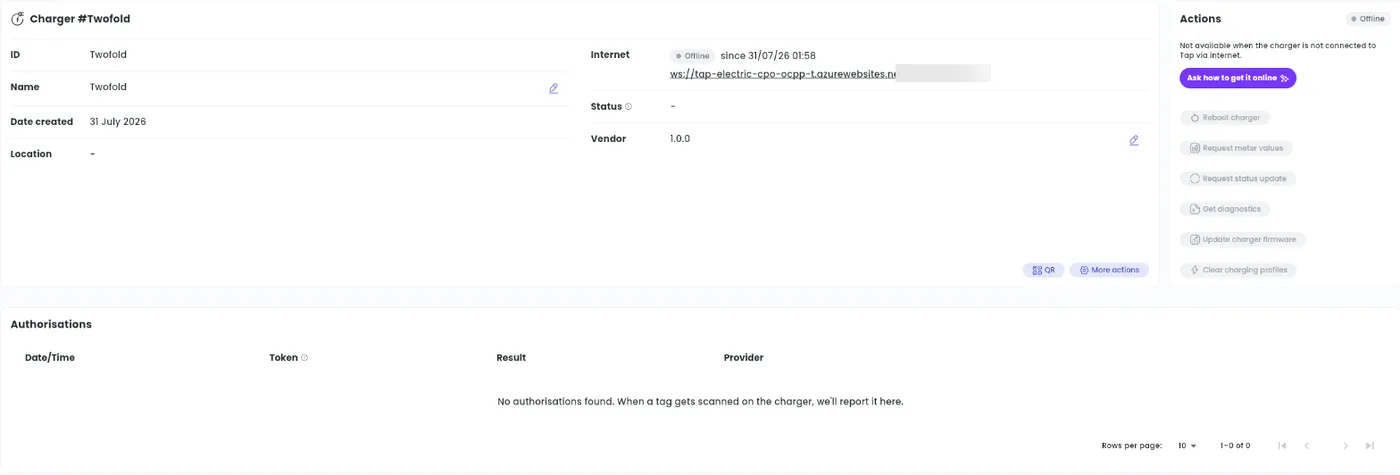
Commands only work while the charger is online. If the charger is offline, its page says so: tap Ask how to get it online in the app for step-by-step help from Tap Assistant.
Send a command to several chargers at once
Section titled “Send a command to several chargers at once”This isn’t available in the app. Use Tap Web.
-
Go to Chargers.
-
Tick the chargers you want. To narrow the list first, use the filters, e.g. Connectivity or Firmware version.
-
Click Bulk actions, then Send OCPP message.

-
Choose an Action: Reset, Trigger Message, GetConfiguration, ChangeConfiguration, UpdateFirmware or GetDiagnostics.
-
Fill in the details for that action and click Send to [number] chargers.
Commands only reach chargers that are online. Filter on Connectivity: Online to see which ones will receive it.
To delete several chargers at once, choose Bulk actions > Delete.
Update firmware on several chargers
Section titled “Update firmware on several chargers”-
Tick the chargers, then click Bulk actions > Send OCPP message.
-
Under Action, choose UpdateFirmware.
-
Choose Upload file and pick the firmware file, or choose URL and enter the link the chargers can download it from.
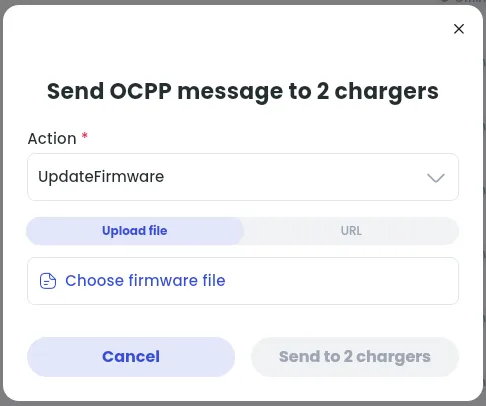
-
Click Send to [number] chargers.
Firmware files are usually specific to one model, so only select chargers of the same make and model before sending a file. Chargers usually restart to install an update, so pick a time when they aren’t in use.
QR stickers
Section titled “QR stickers”Link a QR sticker so drivers can find the charger in the Tap app. See How do I link and unlink a QR sticker to my charger?.
Charger message log
Section titled “Charger message log”See every OCPP message between the charger and Tap.
-
Under Help & maintenance > Troubleshooting, tap Message log.
-
To show only some message types, tap the filter icon.
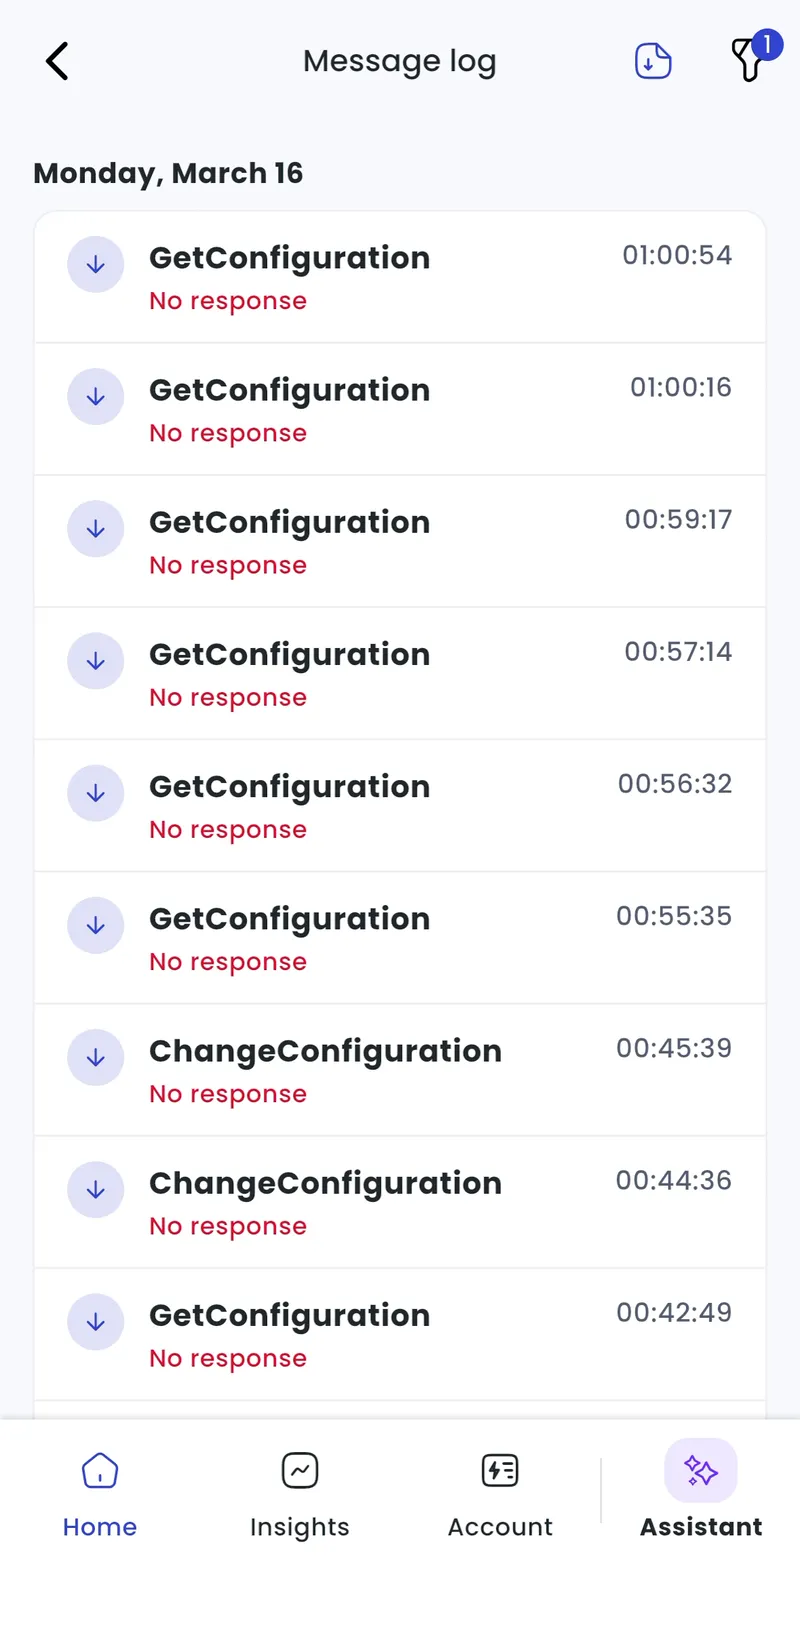
-
Click More actions > Message log.
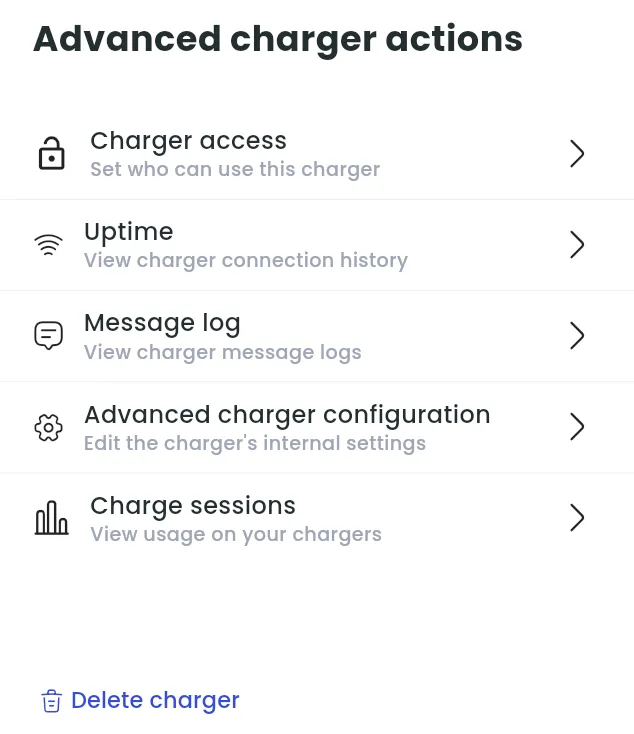
OCPP message glossary
Section titled “OCPP message glossary”| Message | Sent by | Description |
|---|---|---|
| TriggerMessage | Tap | Asks the charger to send a message, e.g. BootNotification or Heartbeat. |
| BootNotification | Charger | The charger is starting up. Includes vendor, model, firmware and serial number. |
| GetConfiguration | Tap | Asks for the charger’s configuration settings. |
| Heartbeat | Charger | Sent regularly to confirm the charger is online. |
| Authorize | Charger | Checks whether an RFID tag (idTag) is allowed to charge. |
| StartTransaction | Charger | A session started with an RFID tag. |
| StopTransaction | Charger | A session stopped with an RFID tag. |
| RemoteStartTransaction | Tap | Starts a session from an app. |
| RemoteStopTransaction | Tap | Stops a session from an app. |
| MeterValues | Charger | Meter readings during a session: energy used since the last reading. |
| Reset | Tap | Reboots the charger. |
| SetChargingProfile | Tap | Sends a charging profile to the charger. |
| ChangeConfiguration | Tap | Changes the charger’s configuration settings. |
| UpdateFirmware | Tap | Tells the charger to download and install new firmware. |
| FirmwareStatusNotification | Charger | Reports the progress of a firmware update, e.g. Downloading or Installed. |
| GetDiagnostics | Tap | Asks the charger to upload a diagnostics file. |
Charger uptime
Section titled “Charger uptime”See when the charger was online and which IP address it used.
-
Under Help & maintenance > Troubleshooting, tap Uptime.
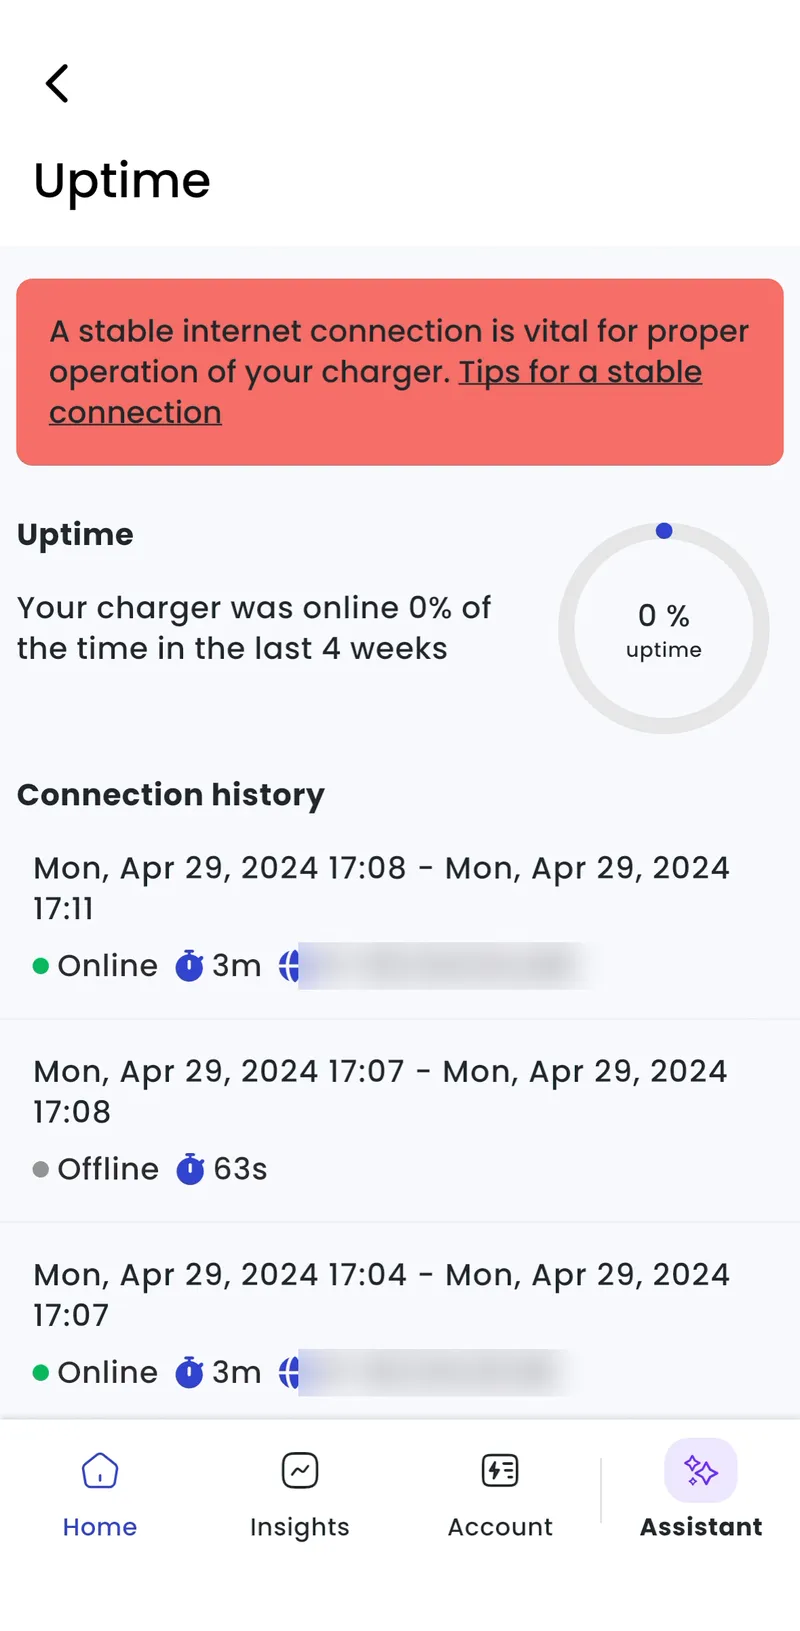
- Click More actions > Uptime.
If the IP address changes often, the charger is usually switching between Wi-Fi and SIM, which means the connection is unstable. Your internet provider may be able to help improve the signal.
Authorisations
Section titled “Authorisations”See every attempt to start a session on the charger with a card or the app, whether it succeeded and, if it failed, why. Useful when a driver says their card doesn’t work.
Under More, tap Authorisations.
Open the charger (Chargers > [your charger]). Authorisations is on the charger’s main page.
Charger access
Section titled “Charger access”A charger’s own access settings override the location’s. Open Charger access (on Web: More actions > Charger access). See How do I set up my location access and visibility?.
Advanced charger configuration
Section titled “Advanced charger configuration”View and, where possible, edit the charger’s full list of OCPP configuration settings, e.g. the heartbeat interval, or permanently locking the cable on a home charger. What each setting does depends on the brand: check the manufacturer’s manual.
This isn’t available in the app. Use Tap Web.
- Click More actions > Advanced charger configuration.
- Click Read configuration from charger.
- To edit a setting, click its pencil icon.
Set up a home charger for “plug and charge”
Section titled “Set up a home charger for “plug and charge””Start charging as soon as you plug in, without an RFID tag or the app. You’ll need Tap Web and an Android phone.
- Find your RFID tag’s internal chip ID: open an app such as NFC Tools on Android, tap Read and scan the tag. Copy the 14-character ID.
- On Tap Web, open the charger and click More actions > Advanced charger configuration.
- Click Read configuration from charger.
- Find your brand’s plug and charge field (check the charger manual). For example:
- Zappi: PlugAndChargeID
- Zaptec: FreeChargingIdTag (FreeCharging must be set to True)
- Alfen: Plug&Charge ID (Authorization Mode must be set to Plug & Charge)
- Click the pencil icon next to the field, paste the ID and click Confirm.
- Do a test session to check it works.
Delete a charger
Section titled “Delete a charger”- Scroll down and tap Delete charger, then Confirm. This can’t be undone.
- Click More actions > Delete charger and confirm.