
How do I create and manage my fleets with Tap?
Last updated:
Only available on Tap Web
Fleet management is only available on Tap Web.
Fleet plans
Section titled “Fleet plans”There are three fleet plans. You see the price of each when you create a fleet.
- Standard: for small fleets getting started with office/depot and public charging. Access to Tap’s roaming network across Europe, the fleet manager dashboard, and one VAT-compliant invoice for all work and public charging.
- Business: for growing fleets that need home reimbursement and stronger controls. Adds home reimbursement, one invoice that also covers home charging, and secure fleet charging (two-factor authentication with webhooks).
- Advanced: for large or complex fleets. Adds cost controls with budgets and price limits, and country restrictions.
Create a fleet
Section titled “Create a fleet”-
Click Fleets in the sidebar (under Drivers), then Create a new Fleet.
-
Enter the Fleet name and choose a plan. You can create several fleets with different plans. You only pay for a plan once a driver or vehicle has been added.

-
Click Next.
-
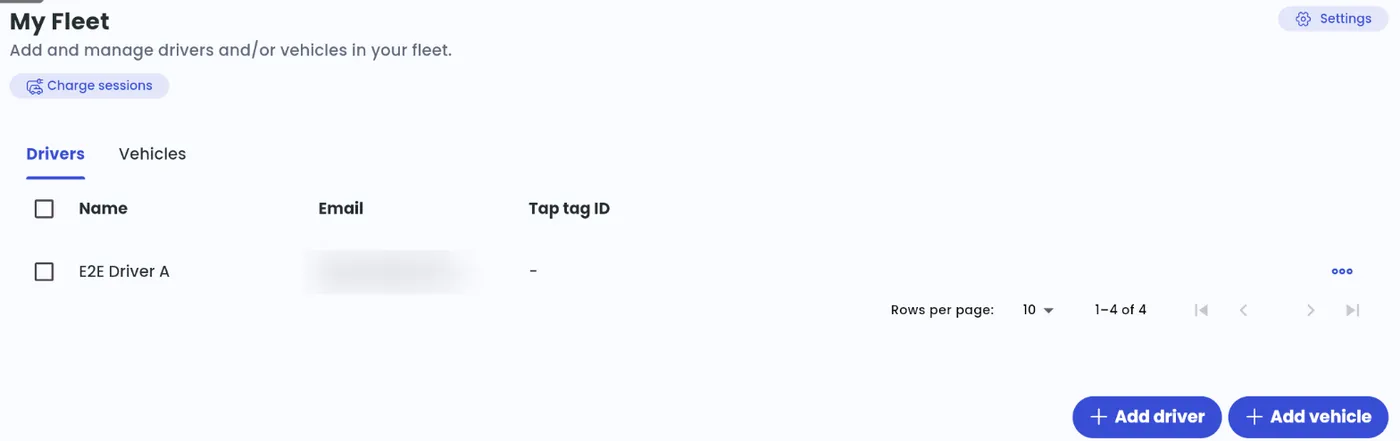
Add drivers or vehicles. Add a driver when a charge card belongs to one person, or a vehicle when the card stays in a shared pool vehicle.
Add a driver
Section titled “Add a driver”For home reimbursement (split billing), add the driver’s home location first. See Set up an Organisation Account.
-
Open the fleet and click Add driver.
-
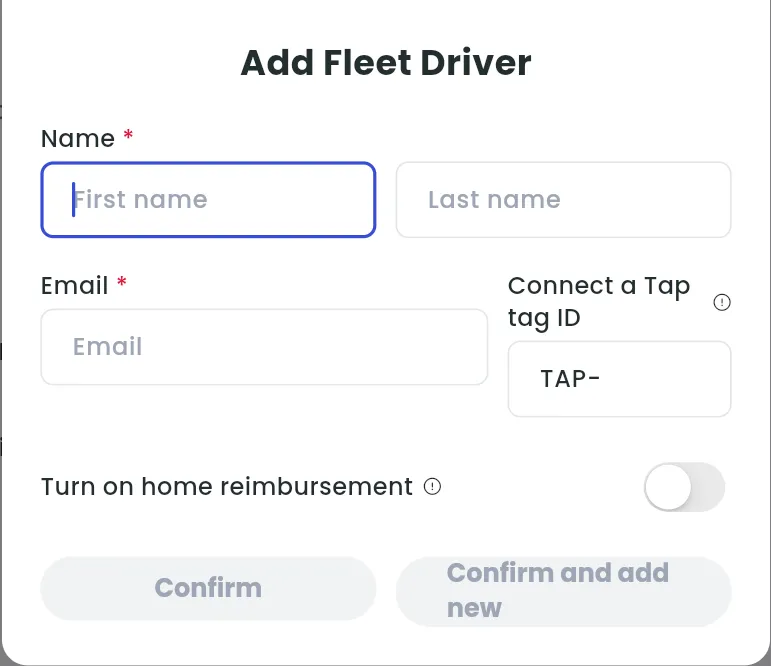
Enter the driver’s name and email.
-
Optionally, enter a Tap Tag ID under Connect a Tap tag ID.
-
Without home reimbursement, click Confirm (or Confirm and add new). With home reimbursement, continue below.
Add home reimbursement for a driver
Section titled “Add home reimbursement for a driver”-
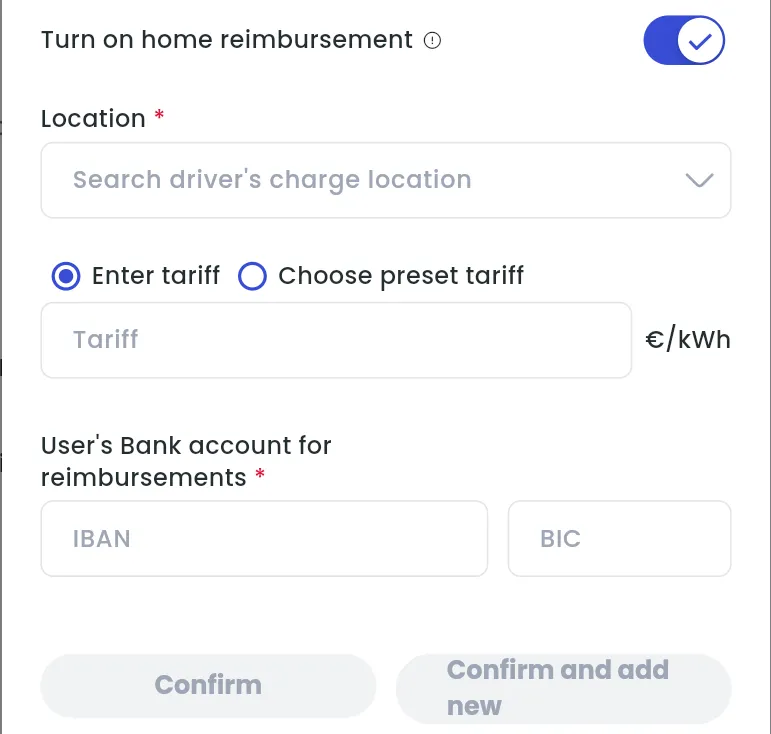
In the Add Fleet Driver form, turn on Turn on home reimbursement.
-
Select the driver’s home charger under Location.
-
Choose Enter tariff and enter the reimbursement tariff, or (for Belgium) Choose preset tariff.
-
Enter the driver’s bank account (IBAN and BIC; in the United Kingdom, Account number and Sort code).
-
Click Confirm (or Confirm and add new).
Questions about home reimbursement? See FAQ - Home reimbursement (Split Billing).
Add a vehicle
Section titled “Add a vehicle”-
Open the fleet and click Add vehicle.
-
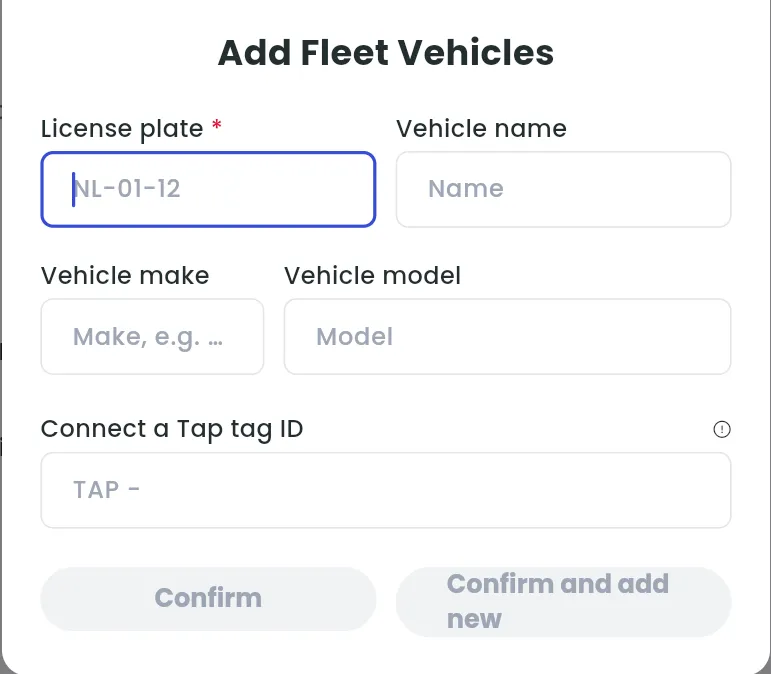
Enter the License plate. This is the vehicle’s main ID.
-
Optionally, enter the vehicle name, make and model, and a Tap Tag ID.
-
Click Confirm (or Confirm and add new).
Edit fleet settings
Section titled “Edit fleet settings”-
Click Fleets in the sidebar.
-
Click … next to the fleet, then Settings. (Or open the fleet and click Settings in the top right.)
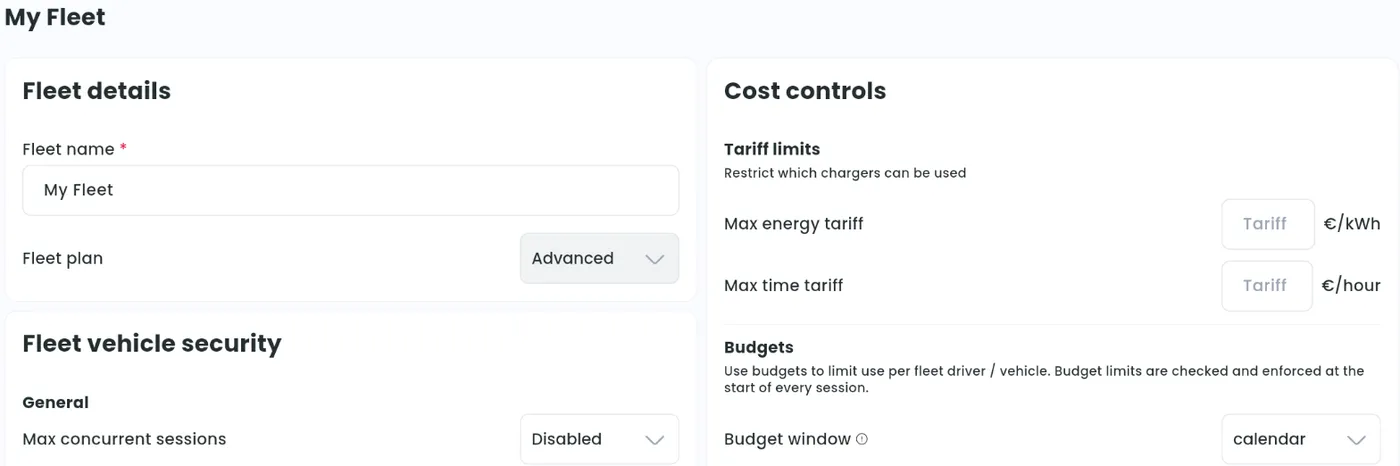
- Fleet name.
- Fleet plan: you can’t change it yourself. Contact Tap support, or create a new fleet with a different plan.
- Fleet vehicle security: to learn how Tap can secure your fleet, email [email protected].
- Countries (Advanced plan): turn off Allow charging in all countries to choose where drivers can charge, e.g. only in Belgium and France.
- Tariff limits (Advanced plan): drivers can’t charge at locations above the Max energy tariff or Max time tariff.
- Budgets (Advanced plan): daily, weekly, monthly or yearly limits on cost or energy (kWh), per calendar or rolling window. Budgets are checked at the start of every session.
- Transaction limits (Advanced plan): the maximum number of sessions per driver or vehicle per day.
Delete a fleet
Section titled “Delete a fleet”- Click Fleets in the sidebar.
- Click … next to the fleet, then Delete, and confirm.
Edit a driver or vehicle
Section titled “Edit a driver or vehicle”- Click Fleets in the sidebar and open the fleet.
- Click … next to the driver or vehicle, then Edit.
- Change the details and click Confirm.
For drivers you can edit the name, Tap Tag ID and home reimbursement details (bank account and tariff). For vehicles: licence plate, name, make and model, and Tap Tag ID.