
Zappi onboarding guide
Last updated:
Add the charger to your own Individual or Organisation Account. Installers: switch into your customer’s account first.
Check the requirements
Section titled “Check the requirements”- The zappi model designation has an H and the serial number starts with 2. These models have built-in Wi-Fi/Ethernet OCPP support.
- The firmware is version 5.794 or later.
- The charger is registered at myaccount.myenergi.com.
- If you have more than one zappi: set one charger as the Master with vHub on, and turn vHub off on all the others.
Copy your Tap URL
Section titled “Copy your Tap URL”-
With Manage selected at the top, open your location on the Home tab, tap Chargers, then Connect new chargers. For a new location, tap + below your locations on the Home tab.
-
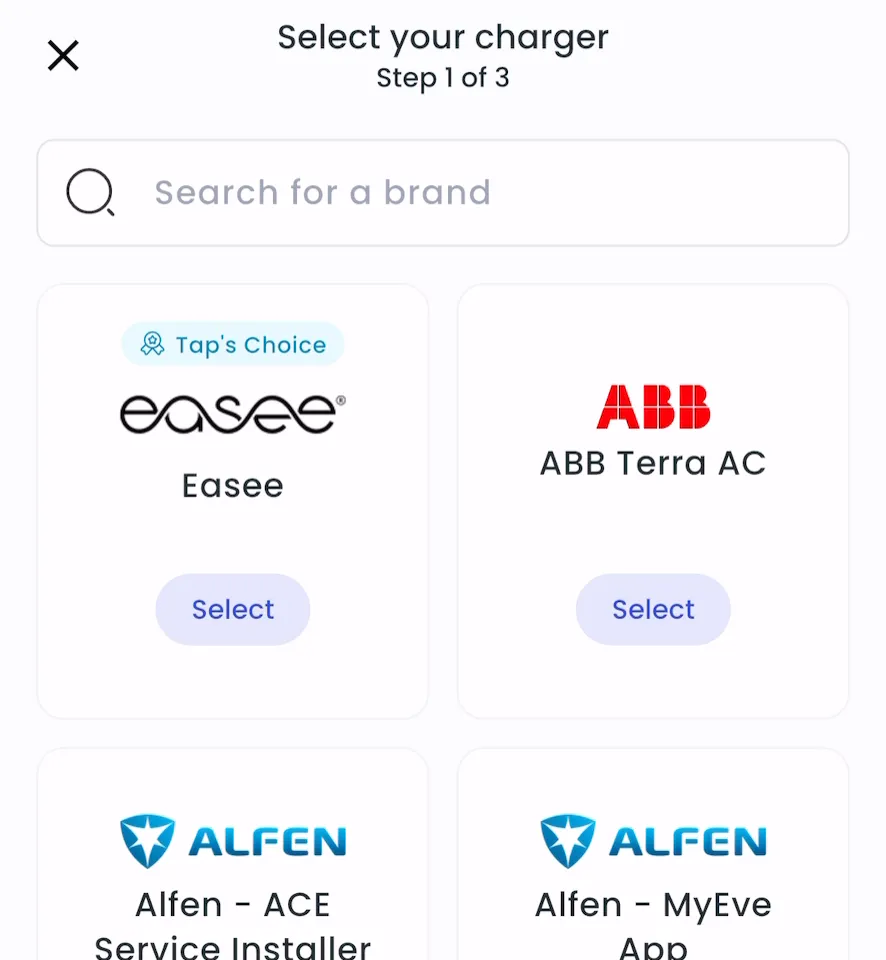
Search for zappi and tap Select.
-
Copy the URL.
-
Locations > Connect new chargers, or click Connect new chargers on a location page.
-
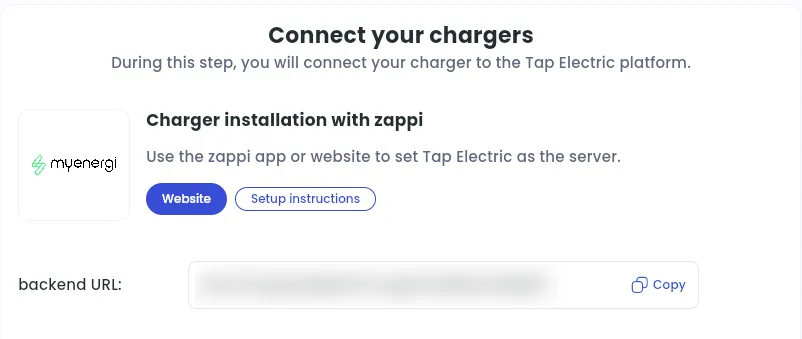
Under Choose your charger brand, search for zappi and click it.
-
Copy the backend URL. It ends with a slash (/).
Set Tap as the OCPP backend in myenergi
Section titled “Set Tap as the OCPP backend in myenergi”-
Sign in at myaccount.myenergi.com.
-
Go to Location > myenergi products, select your zappi and open OCPP settings.
-
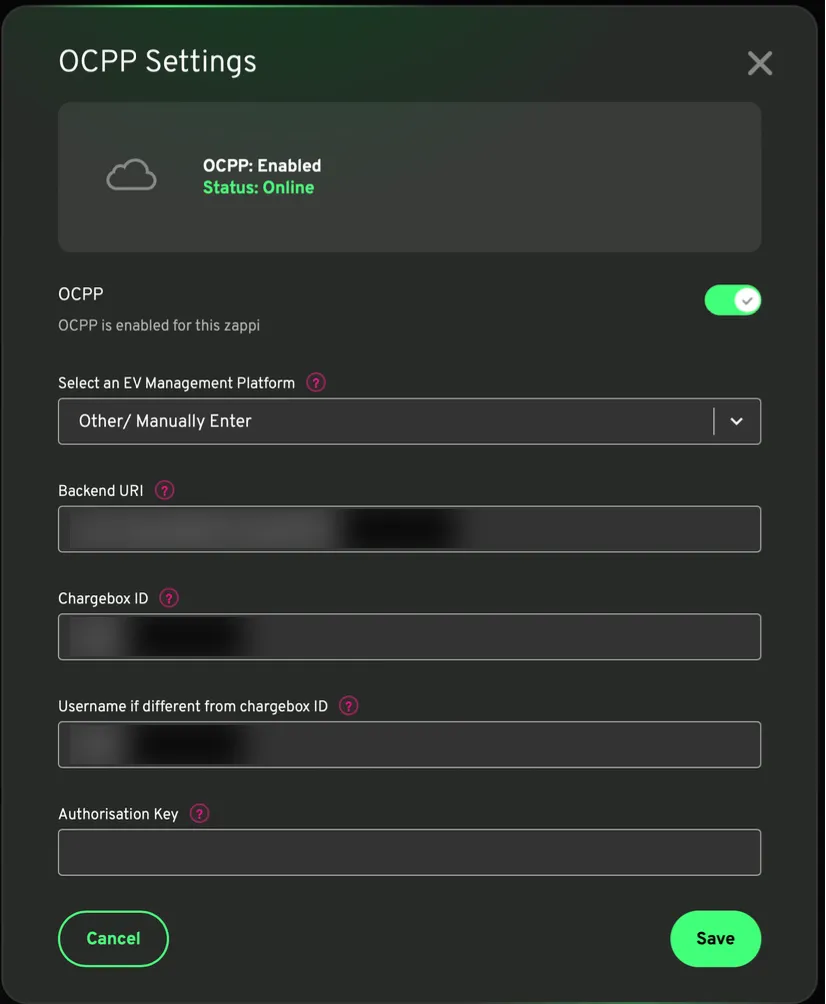
Under Select an EV Management Platform, choose Other / Manually Enter.
-
Fill in:
- Backend URI: the URL from Tap, exactly as copied, including the slash at the end
- Chargebox ID: the zappi serial number
- Username: the same as the Chargebox ID
- Authorisation Key: leave blank
-
Save and enable OCPP.
After a minute, the charger appears in Tap.
Set the lock function on the charger
Section titled “Set the lock function on the charger”- On the zappi, open Other Settings > Lock Function.
- Set EV plugged to ON, EV unplugged to ON and Charge to OFF.
If Charge is ON, anyone can start charging without entering the PIN. The PIN then only protects the menu. Change the PIN from its default.
Set the location
Section titled “Set the location”- Under Where is the charger?, choose New location and enter the address, or pick an Existing location.
- On You’re all set, choose what to do next, or tap Go to my location.
- Under Your chargers, check that the charger is listed, then click Continue.
- Complete the Set location and Location settings steps.
Public chargers: set up commercial mode
Section titled “Public chargers: set up commercial mode”Each public charger needs a QR code sticker to comply with AFIR. The zappi has no RFID reader, so drivers start charging by scanning the QR code, which shows once a vehicle is plugged in.
- Link the QR code sticker to the charger in the Tap Electric Charge Point Operator app.
- Scan the QR code to get the payment URL, and shorten it with a URL shortener. The zappi accepts a PaymentURL of up to 52 characters.
- Attach the sticker to the charger.
- In Tap Web, open the charger and go to Advanced charging station configuration > Read configuration. Set:
- CommercialMode: TRUE
- MaintenanceMode: TRUE (keeps access to the charger menu)
- FreeCharging: FALSE
- FreeVendScreen: FALSE
- StopTransactionOnInvalidId: FALSE (the zappi sends a random ID)
- OCPPChargeMode: Fast
- Currency: the currency code this charger uses for public charging payments (for example GBP or EUR)
- Price per kWh: the price you want this charger to show for public charging sessions
- PaymentURL: your shortened QR code URL
- PlugAndChargeId: leave blank
- App name: your provider name, shown on the charger
- Charger ID: the serial number, matching Tap
- Charger name: the location name, for example the street or building
- Each change takes about 10 to 20 seconds. If you see an error, click Retry.
- Test the installation: plug in a vehicle, check the QR code shows and opens the right page, start and stop a short session, and check the session in Tap.