
How do I set up contactless payments at my charger locations?
Last updated:
Only available on Tap Web
Add a contactless payment terminal to a location so drivers can pay by card at your chargers.
Supported terminals
Section titled “Supported terminals”- Nayax Onyx
- Nayax VPOS Touch
- Nayax VPOS Media 4
- Payter Apollo
Add a terminal in Tap
Section titled “Add a terminal in Tap”-
Locations > [your location] > Other location settings > Payment terminals
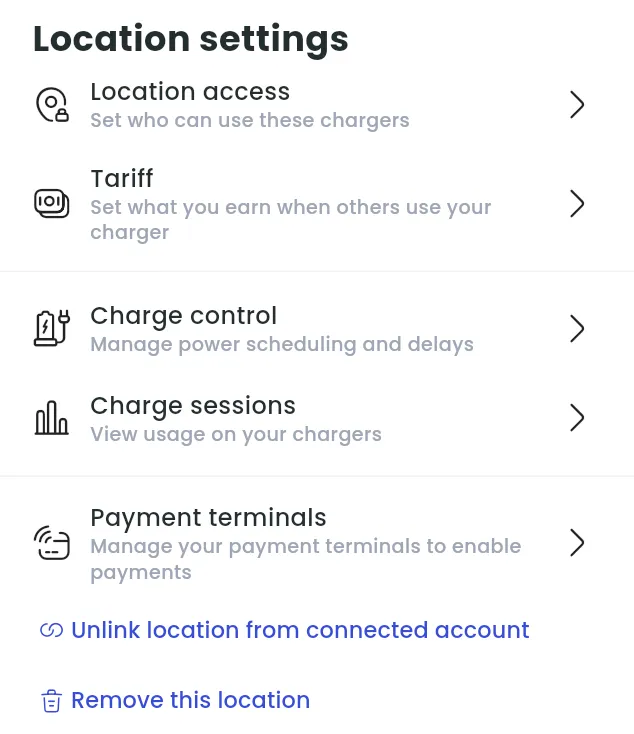
-
Click Connect new terminal. (For your first terminal, you go straight to the next step.)
-
Optionally, name the terminal so you can tell terminals apart at the same location.
-
Choose the terminal Brand and model, then click Save and continue.
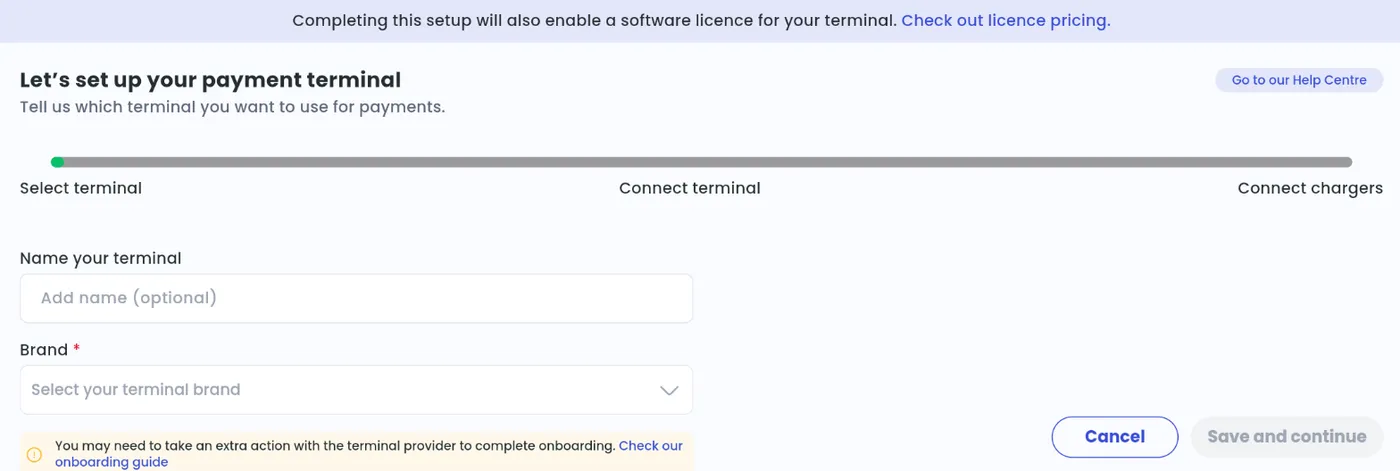
-
Enter the terminal’s serial number and click Save and continue.
-
Select the chargers to link to the terminal. Drivers choose from these charger IDs on the terminal screen. Click Save.
Then finish the setup for your brand below.
Payter Apollo
Section titled “Payter Apollo”Connect the terminal to the internet
Section titled “Connect the terminal to the internet”- LAN cable: plug the terminal into your wired connection.
- Payter SIM: a terminal bought with a Payter SIM comes preconfigured and connects by itself.
- Tap SIM or your own SIM: enter the SIM’s settings in the terminal (see below). For a Tap SIM, email [email protected].
- Wi-Fi: enter your Wi-Fi settings in the terminal (see below).
Open the terminal’s service menu
Section titled “Open the terminal’s service menu”The service menu uses two-factor authentication with MyPayter. After you add the terminal in Tap, you get an email to log in to the MyPayter account we create for you.
- Insert the SIM in the terminal’s modem, if you use one.
- Switch on the terminal.
- Tap the top-left corner of the screen 5 times to open the hidden settings menu. On some units, the top middle works instead.
- Tap Settings (the gear, bottom right).
- Tap the icon next to Challenge and note the code.
- Log in to MyPayter on your computer and search for the terminal’s serial number.
- Click the gear icon, then the 3 dots on the right, and choose Service menu.
- Enter the code from the terminal. MyPayter shows a new code.
- Enter that code on the terminal. You’re now in the service menu.
Enter SIM or Wi-Fi settings
Section titled “Enter SIM or Wi-Fi settings”- SIM: in the service menu, scroll down to Modem Settings, enter the SIM’s settings and tap Save.
- Wi-Fi: in the service menu, scroll down to WLAN Settings, enter your network name and password and tap Save.
The terminal should now show as connected in MyPayter. Check your location’s tariff and test with a real session before opening it to the public.
Nayax terminals
Section titled “Nayax terminals”When you click Save in the last step, the location is sent to Nayax and our team is notified. We’ll let you know when the terminal is ready to use. If you later change the linked chargers, you may also need to update them in your Nayax environment.
Edit or remove a terminal
Section titled “Edit or remove a terminal”- Locations > [your location] > Other location settings > Payment terminals
- Click … next to the terminal.
- Choose Edit to change the linked chargers, or Remove to delete the terminal (check the name or serial number, then click Confirm).
You can’t edit a terminal’s serial number. To change it, remove the terminal and add it again.
Tariffs and payouts
Section titled “Tariffs and payouts”Contactless sessions use the same tariff as other sessions at the location. You don’t need a special tariff. Tap adds a transaction fee for the driver, as for a guest user in the Tap app.
We pay out all sessions on your chargers monthly: contactless, the Tap app, Tap Tags and Which roaming charge cards and apps are integrated with Tap?. You don’t need to do anything extra. See What are Payout Settings and why do I need them?.