
Set up an Organisation Account
Last updated:
One account for your organisation’s charging locations.
Use an Organisation Account when chargers are managed on behalf of a company or other organisation — for example a workplace, hospitality venue, fleet or owners’ association.
Applies to the Netherlands, Belgium, Ireland and the United Kingdom. Where something differs by country, it is noted below.
Before you start
Section titled “Before you start”Have this ready:
- Organisation name and address
- VAT number and tax details
- An administrator contact for invoices and alerts
- The address of each location you want to add
- Your intended access and pricing setup
- Bank details if the organisation will receive charging payouts
1. Create your Organisation Account
Section titled “1. Create your Organisation Account”- With Manage selected at the top, go to Account, tap the account switcher under Managing and tap +.
- Choose how you’ll use Tap and tap Next.
- On Account address, open the Organisation tab and enter your organisation’s name and address.
- Choose your tax settings and tap Next.
- Check the summary and tap create account.
-
Sign up at web.tapelectric.app. Already have a Tap account? Open the account switcher (bottom left) and select Create new account.
-
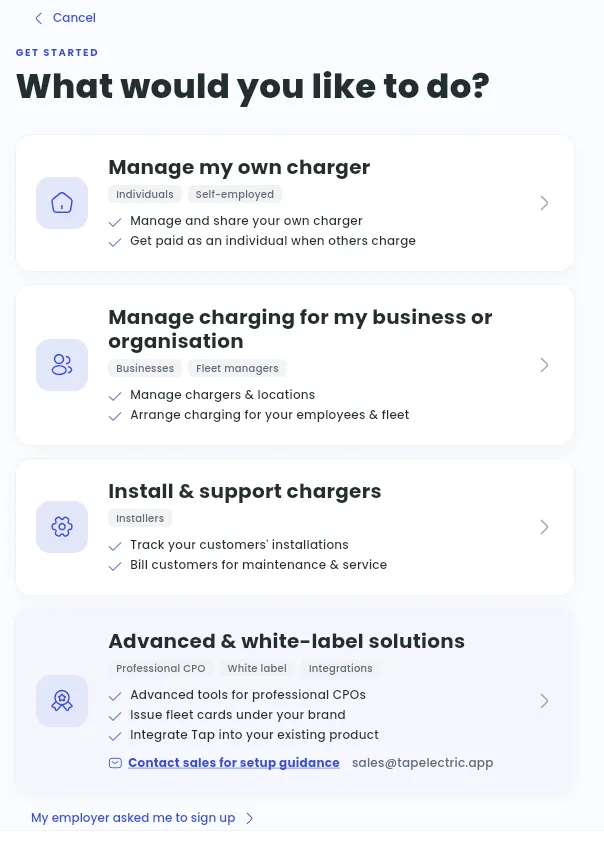
Under What would you like to do?, choose Manage charging for my business or organisation.
-
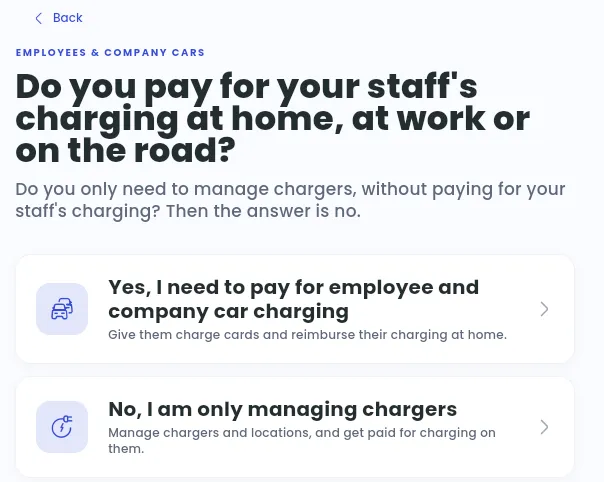
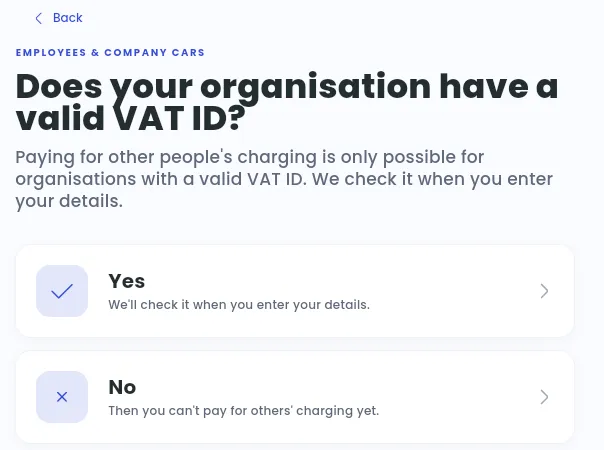
Say whether you pay for your staff’s charging at home, at work or on the road (charge cards and home-charging reimbursement). Only managing chargers? Choose No, I am only managing chargers. Paying for other people’s charging needs a valid VAT ID; without one, select Continue with chargers only.
-
In the Netherlands, choose whether to set up ERE certificates now or later.
-
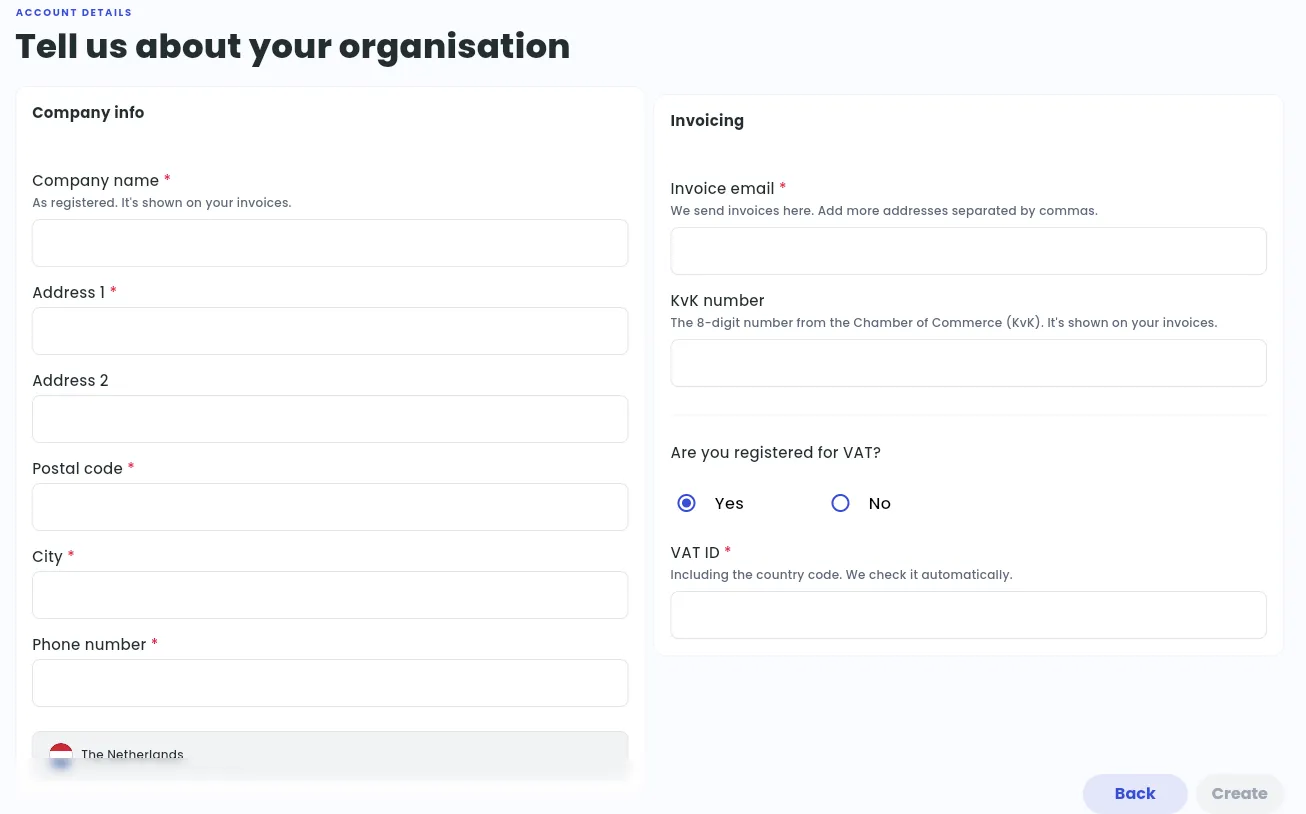
On Tell us about your organisation, enter the company name as registered, its address and a phone number. Under Invoicing, enter the invoice email (separate several addresses with commas), your company registration number if asked (in the Netherlands, your KvK number), whether you’re registered for VAT, and your VAT ID. We check the VAT ID automatically. Your country comes from your Tap profile.
-
Select Create. On the welcome screen, select Add charger, or Go to my dashboard.
Use one Organisation Account for the organisation, then add the locations and chargers that belong to it.
2. Connect the charger and add its location
Section titled “2. Connect the charger and add its location”-
With Manage selected at the top, go to the Home tab and tap + below your locations. To add a charger to an existing location, open the location, tap Chargers, then Connect new chargers.
-
Next to the charger’s brand, tap Select.
-
Follow the steps for the brand. Depending on the brand, you sign in to its account, enter the charger ID, or enter settings on the charger.
-
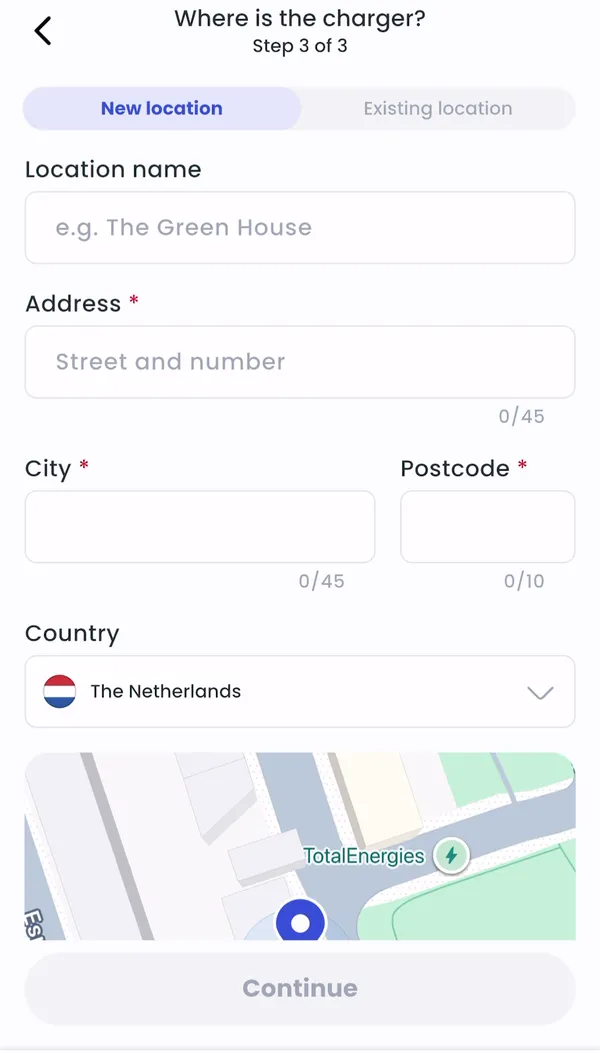
Under Where is the charger?, choose New location and enter the site’s address, or pick an Existing location.
-
Always check the map pin and move it if the exact charger location is different.
-
On You’re all set, tap Go to my location.
- Locations > Connect new chargers, or click Connect new chargers on a location page.
- Under Choose your charger brand, select the make of the charge point.
- Follow the setup instructions for the brand, including the WebSocket / OCPP URL where required. Once configured correctly, the charger appears in Tap automatically.
- At Set location, enter the site’s address. Always check the map pin and move it if the exact charger location is different. Under What kind of site is this?, choose Public or Private and the type of site, then select Save and continue. Work through the setup steps (tariff, access, Connected Account, reimbursement and more) or skip them for now. See How do I add a new location?
To add a location first, choose Create an empty location on the brand screen.
Tap Electric supports chargers using the OCPP 1.6 protocol. See Which EV chargers are fully integrated with Tap? for each brand’s guide. If your installer offers a Service Plan, you can select it when you add the charger.
3. Set access
Section titled “3. Set access”Choose who can start charging at the location:
- Closed — only members of the driver groups you link
- Tap users — anyone with the Tap app or a Tap Tag
- Roaming — Tap users, plus external charge cards and apps
Driver groups are useful when different groups should have different access or rates, for example employees, residents or visitors.
In the setup steps after you add a location, these options are called Only my drivers (Closed), Tap drivers (Tap users) and Everyone, with roaming (Roaming). The visibility options below are called Only drivers with access, Driver groups and nearby drivers and Everyone.
4. Set visibility
Section titled “4. Set visibility”Choose who can find the location: Driver Groups only, Driver Groups and nearby, or Everyone.
Use this together with access settings to match how the site should operate. See How do I set up my location access and visibility?.
5. Set your rate
Section titled “5. Set your rate”Set the price per kWh you want to receive. You can also add a start fee per session and an idle fee per hour.
You can give specific driver groups their own rate where needed. See How do I set tariffs for my charger location or individual chargers?.
6. Set up payouts
Section titled “6. Set up payouts”If drivers will pay to charge, go to your payout settings (Admin > Account > Settings > Payouts on Web) and add the organisation’s payout details. See What are Payout Settings and why do I need them?.
By country:
- Netherlands, Belgium and Ireland: IBAN. A BIC is not required within the SEPA zone.
- United Kingdom: bank account number and sort code.
7. Set up your own drivers
Section titled “7. Set up your own drivers”Create the driver groups you need and add the people who should have special access or pricing. See What is a Driver Group and how can I use it to customise access and tariffs?.
For example, employees or residents can be given free or discounted charging while public or roaming drivers pay the normal rate.
Optional features
Section titled “Optional features”Organisation Accounts can use Tap’s Fleet module to issue Tap charge cards and manage fleet drivers. See How can I benefit from Tap for Fleet Management?.
If you need Fleet, contact Tap to have the module activated.
Home-charging reimbursement
Section titled “Home-charging reimbursement”Organisations using Fleet can also reimburse employees for eligible charging at home. You set a reimbursement rate per employee, and Tap pays it into the employee’s bank account each month. See FAQ - Home reimbursement (Split Billing).
Connected Accounts
Section titled “Connected Accounts”A Connected Account is a separate account linked to your Organisation Account. It has its own locations, rates and payout details. Your admins can manage it alongside your own account, and you can invite other people to be its admins.
Use one when part of your setup needs to be managed or paid out separately. The most common case is an employee’s home charger under home-charging reimbursement (see below). Connected Accounts are also useful when parts of your organisation, such as subsidiaries or departments, need payouts to different bank accounts, because payouts are set per account. See What is a connected account and when do I need one?.
Employee home chargers — when to use a Connected Account
Section titled “Employee home chargers — when to use a Connected Account”If you reimburse home charging and the employee needs to control their own charger, put that charger in a Connected Account. You stay in control of the reimbursement.
Use a Connected Account when the employee needs to:
- Set their own rate for other people who charge at their home — for example, a spouse whose own employer reimburses them through a third-party charge card
- Receive payouts for those sessions in their own bank account, not yours
- Netherlands only: claim ERE credits for their home charger and receive the payout themselves
You don’t need one if the employee’s household only charges for free. Keep the charger in your Organisation Account and set its default rate to zero. Reimbursement is linked to the employee’s Tap Tag, so you are only billed for their sessions.
How to set it up
- Create the Connected Account. In your Organisation Account, go to Admin > Account > Connected accounts > Connect new account and enter the employee’s details.
- Add the employee’s charger. Add the home location and charger. In the location’s Connected account setup step, choose At an employee’s home and pick the employee’s Connected Account. You can also do this later: open the location and select Link to connected account.
- Give the employee admin rights. Open the Connected Account, then go to Admin > Account > Account administrators > Invite new admin.
- Set the reimbursement rate. From your Organisation Account, add the employee as a Fleet driver, turn on home reimbursement, enter their bank details and reimbursement rate, and select their home location.
- The employee sets the rest. In the Connected Account, the employee sets the charger’s normal rate, access, visibility and their own payout details.
Who controls what
- You, from your Organisation Account: the reimbursement rate paid for the employee’s own charging.
- The employee, from the Connected Account: the rate everyone else pays (such as a spouse’s charge card), access, visibility and payouts for those sessions. The two rates are independent.
Admins of your Organisation Account can still manage the Connected Account’s location, so agree with the employee who changes what.
If a third-party charge card will be used, access must include Roaming. Setting visibility to Driver Groups and nearby keeps the home charger off public maps.
Green Credits / ERE — Netherlands only
Section titled “Green Credits / ERE — Netherlands only”Organisations may qualify for ERE credits where the relevant energy meter is registered to the organisation.
You can manage this from Admin > Account > Green Credits.
ERE does not apply in Belgium, Ireland or the United Kingdom.
Owners’ associations
Section titled “Owners’ associations”A VvE, VME or Residents’ Management Company should use an Organisation Account.
Residents do not normally need access to the organisation’s dashboard. They can use their own Tap account or another supported charging method, depending on how you configure access.
Quick check before you’re done
Section titled “Quick check before you’re done”Open the Tap Electric dashboard at web.tapelectric.app.