
Rolec GreenFlux onboarding guide
Last updated:
This is an older Rolec product and setup is technical. If you’re not comfortable changing network settings, ask for help. Have a newer Rolec? See Rolec Connect onboarding guide.
You need:
- the charger password (contact Rolec if you don’t have it)
- a Windows 10 laptop and an Ethernet cable, at the charger
Add the charger to your own Individual or Organisation Account. Installers: switch into your customer’s account first.
Copy your Tap server details
Section titled “Copy your Tap server details”-
With Manage selected at the top, open your location on the Home tab, tap Chargers, then Connect new chargers. For a new location, tap + below your locations on the Home tab.
-
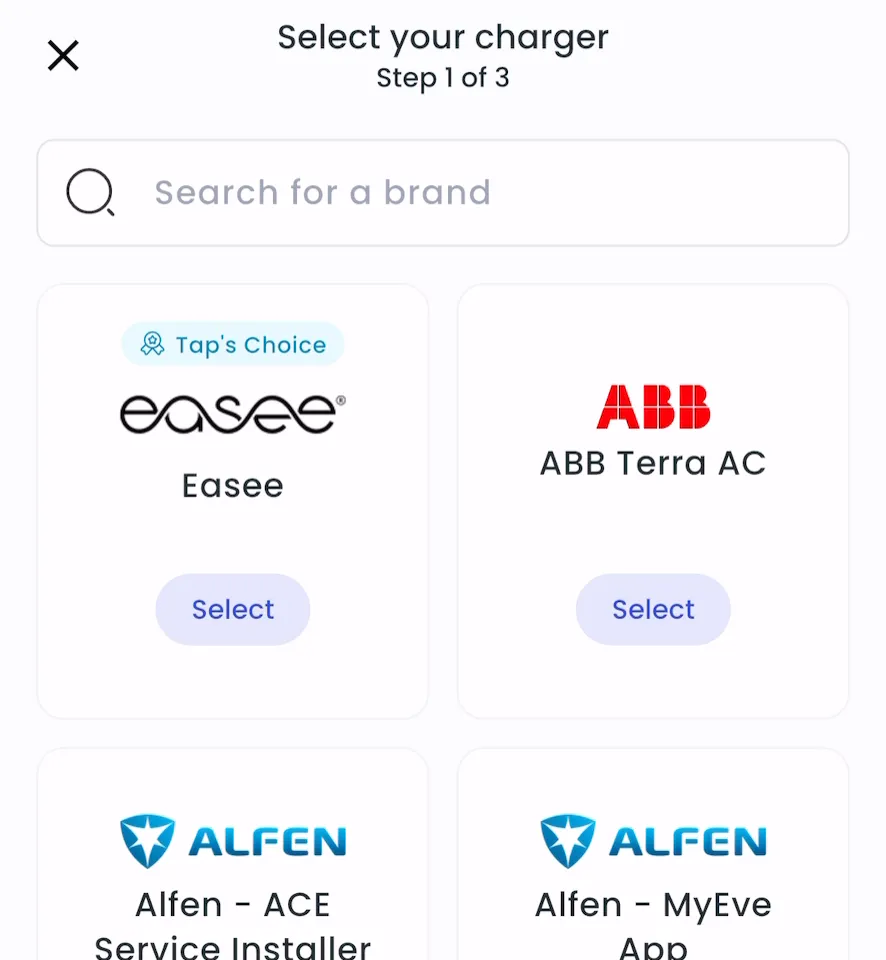
Search for Rolec GreenFlux and tap Select.
-
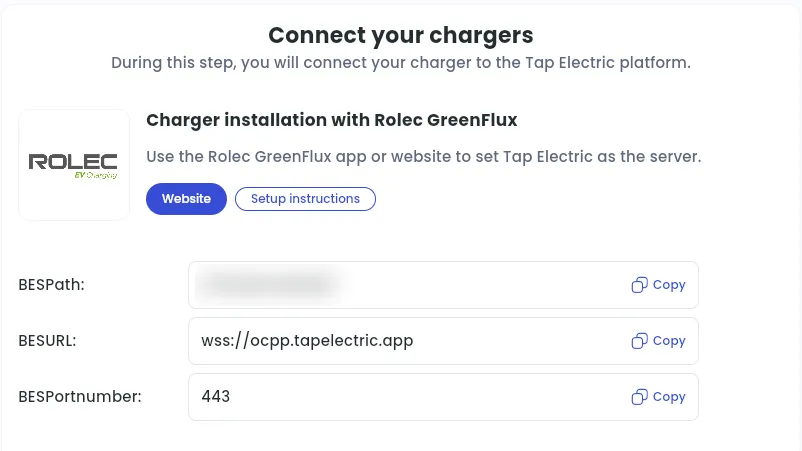
Note the three backend values. The GreenFlux controller needs the Tap URL split into separate fields.
-
Locations > Connect new chargers, or click Connect new chargers on a location page.
-
Under Choose your charger brand, search for Rolec GreenFlux and click it.
-
Note the BESPath, BESURL and BESPortnumber. Each has a Copy button.
Set a fixed IP address on your laptop
Section titled “Set a fixed IP address on your laptop”- On your Windows laptop, go to Start > Settings > Network & Internet.
- Select Ethernet, then Change adapter options.
- Right-click the Ethernet adapter and choose Properties.
- Select Internet Protocol Version 4 (TCP/IPv4) and click Properties.
- Set:
- IP address: 10.1.0.111
- Subnet mask: 255.255.255.0
- Click OK and close the settings windows.
- Unplug the LAN cable and plug it back in to reset the adapter.
Allow ping in the Windows firewall
Section titled “Allow ping in the Windows firewall”- Click Start, search for Windows Defender Firewall and open it.
- Select Advanced settings, then Inbound Rules.
- Find the rules named File and Printer Sharing (Echo Request - ICMPv4-In).
- Enable these rules for all profiles (Domain, Private and Public): select each rule and click Enable Rule. A green check mark shows when a rule is on.
Set Tap as the backend on the charger
Section titled “Set Tap as the backend on the charger”-
Turn the charger on and let it run for at least 2 minutes.
-
Connect your laptop to the charger controller with the Ethernet cable.
-
In Chrome or Firefox, go to 10.1.0.110.
-
Sign in with the charger password.
-
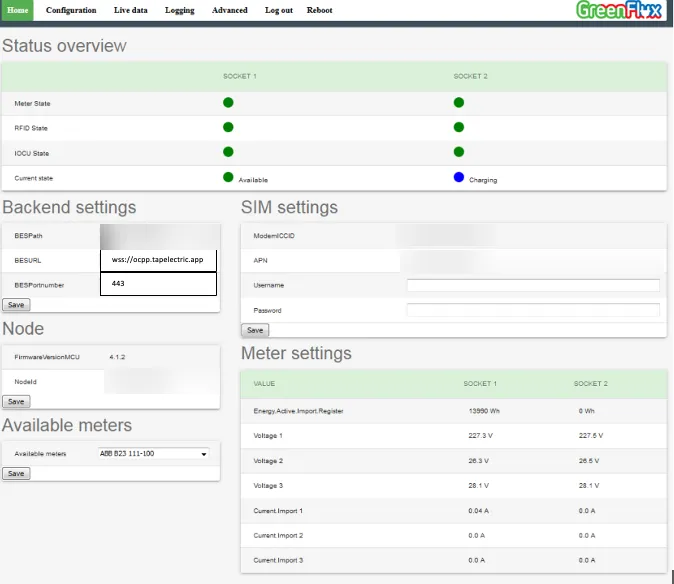
In Backend Settings, enter the BESPath, BESURL and BESPortnumber from Tap.
-
In the SIM settings, enter your SIM card’s APN. If the SIM has a username and password, enter those too.
-
On the Configuration tab, tick Use Secure Websocket.
-
Click Reboot in the top menu bar.
After a minute, the charger appears in Tap.
Set the location
Section titled “Set the location”- Under Where is the charger?, choose New location and enter the address, or pick an Existing location.
- On You’re all set, choose what to do next, or tap Go to my location.
- Under Your chargers, check that the charger is listed, then click Continue.
- Complete the Set location and Location settings steps.